

Most people want to avoid paying professional technicians when their car battery dies in the middle of the road, as DIY solutions can save money. When jump-starting your vehicle, the first step is connecting the jumper cables to the battery. For those looking for effective alternatives, explore testing options without standard tools to ensure you’re prepared for any situation.
If you don’t know how to connect jumper cables to the battery, you won’t be able to jump start your vehicle. You will learn How to connect jumper cables to battery safely. The first thing you need to know about jumper cables is how they work.
A Quick Look
How Do Jumper Cables Work In Jump Starting?
A jumper cable connects two car batteries, one from a working vehicle and the other from a dead or drained vehicle. The clamps on these cables are red for positive terminals and black for negative terminals. Through the cables, the live battery provides an energy boost to the dead one.

NOCO Boost Plus GB40
⭐ 4.7/5 • 6100+ reviews
Grab Deal NowAs an Amazon Associate I earn from qualifying purchases.
Electricity flows from the live battery to the dead one when the cables are correctly connected, reviving the dead battery and allowing the engine to start. To ensure a safe and effective jump-start, it’s essential to connect the clamps in the correct order. Additionally, it’s important to understand the importance of battery recovery time to optimize the performance of your vehicle after a jump-start.
Tools and Materials

Having the right tools and materials on hand is crucial when jump-starting a car. You will need the following:
- Jumper Cables
- Second Vehicle (if available)
- Safety Gear (gloves and safety glasses)


Identifying the Battery

Locating and identifying the car battery is essential before you connect jumper cables. By taking this step, you can ensure you’re working with the correct component and avoid mishaps. For those who enjoy outdoor activities, it’s also wise to ensure you’re prepared for boating emergencies. Here are the steps you need to take:
Pop the Hood
The car’s battery can be accessed by opening the hood. The release lever is usually located near the footwell on the driver’s side. Pull this lever to release the hood latch, then lift the hood carefully from the front of the car. The prop rod on most hoods keeps them open; secure the hood in the open position.
Battery Location
The battery can be found once the hood has been opened. Batteries for cars are usually rectangular and enclosed in plastic or metal casings. They are usually found near the front of the engine compartment, either on one side or the other.
Depending on your vehicle, the battery might be located in the trunk, under a seat, or even in the wheel well. Consult your owner’s manual if you need clarification.
Battery Polarity
Jumper cables must be connected properly by identifying the battery’s polarity. Most batteries have two terminals, one marked with a positive (+) sign and the other with a negative (-). Positive terminals are usually red, while negative terminals are black. Connecting the cables in the wrong order can cause damage to the vehicles’ electrical systems if the terminals are not identified correctly.
Proper Positioning The Vehicle

Jump-starting a car requires proper positioning of the vehicles and ensuring their safety. The right way to do it is as follows:
Positioning the Vehicles
Park the booster vehicle (the one with a functioning battery) close enough to the dead vehicle so that the jumper cables can comfortably reach both batteries, ensuring the two vehicles do not touch. Make sure both cars are in “Park” (for automatic transmissions) or in gear (for manual transmissions), and turn off the ignition keys. For added safety and convenience during such situations, consider looking into versatile charging solutions for your vehicle.
Keeping Engines Off
Make sure that both engines of both vehicles are turned off before connecting the jumper cables. In addition, turning off the engines reduces the risk of accidentally starting one of the vehicles prematurely, which can cause complications during jump-starting.
How To Connect Jumper Cables To Battery?
After positioning the vehicles correctly, connect the jumper cables. To ensure a safe and effective jump-start, precision is required.
Step-by-Step Guide | Connecting jumper cables to battery
Step 1: Inspect Jumper Cables:

Give the cables a quick inspection before attaching them. Check for visible damage, such as frayed wires or exposed metal. Replace the cables if you notice any issues. To prevent electrical hazards, it’s essential to use cables that are in good condition.To ensure a safe and effective process, it’s important to know the best practices for battery jump-starting.
Step 2: Identify Positive and Negative Clamps:

It is common for jumper cables to have two sets of clamps. Positive clamps are usually marked with red or a plus sign (+). A second set is black and marked with a minus sign (-), indicating negative clamps. Do not connect them incorrectly if you cannot distinguish between them.
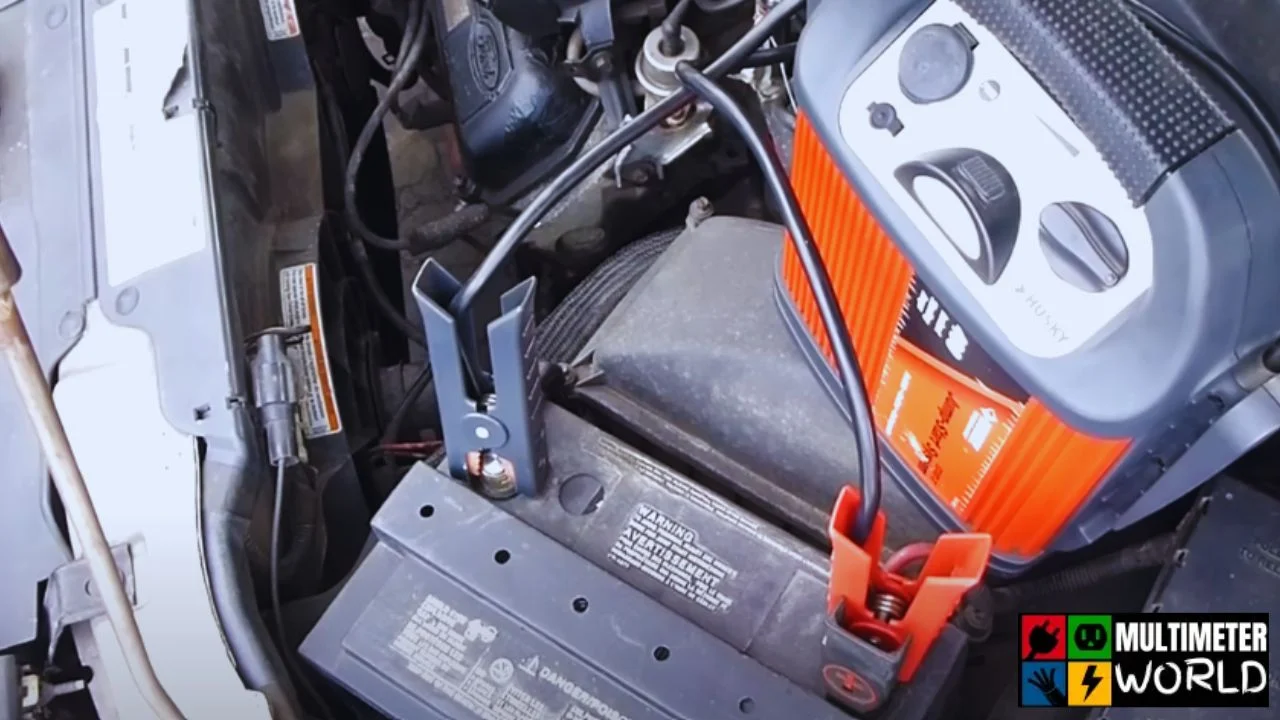
Step 3: Connect Positive (+) Cable:

Connect one of the positive (+) clamps to the positive terminal of the dead battery. Typically, this terminal is marked with a plus sign (+) and covered with a red cap.
Step 4: Connect the Positive (+) Cable to the Dead Battery:

Connect one end of the positive cable to the dead battery and the other end to the positive terminal on the booster vehicle’s battery. Make sure the jump-start cable is securely connected to prevent accidental detachment.
Step 5: Connect Negative (-) Cable:

One negative (-) clamp should be connected to the negative terminal of the booster vehicle’s battery. Typically, this terminal is marked with a minus sign (-).
Step 6: Connect the Negative (-) Cable to the Dead Battery:

Last but not least, attach the remaining negative (-) clamp to an unpainted metal surface. Choose a clean, unpainted metal area away from the battery and any moving parts. Using this as a grounding point reduces the risk of sparks near the battery. Now you know how to connect jumper cables to battery, its time to jump-start a battery.
How To Jump-Start A Battery?

If you encounter a battery that shows signs of damage, it’s crucial to revive a battery in poor condition safely; once all the cables are connected correctly, you can proceed to jump-start your vehicle’s dead battery. However, if the battery is corroded, it’s important to replace it first to ensure safety and effectiveness.
Step 1: Starting the Booster Vehicle:
Start the booster vehicle’s engine – the one with a working battery. Let it idle for a few minutes. As a result of this step, the dead vehicle’s battery can receive a charge from the booster vehicle.
Step 2: Waiting a Few Minutes:
Wait a few minutes while the booster vehicle’s engine runs. During this waiting period, the dead battery receives enough charge to crank the dead vehicle’s engine successfully.
Step 3: Starting the Dead Vehicle:
Start the engine of the dead vehicle now. Press the start button or turn the ignition key as usual. The engine should start without any problems if the jump-start is successful. Wait a bit longer and try again if it doesn’t start right away. After a few attempts, the dead vehicle may require professional assistance or further troubleshooting.
How To Remove Jumper Cables?
Disconnecting jumper cables safely is just as important as connecting them correctly. To ensure a smooth and safe removal, follow these steps:
Step 1: Reverse the Connection Order:
Reverse the connection order to disconnect the jumper cables. Start with the negative (-) cable on the dead vehicle and the negative (-) cable on the booster vehicle. After that, remove the positive (+) cable from the booster vehicle’s battery and the positive (+) cable from the dead vehicle’s battery.
Step 2: Keep Both Vehicles Running for a Few Minutes:
It is a good practice to keep both vehicles running for a few minutes after removing the jumper cables. The booster vehicle’s alternator provides more charge to the dead battery, ensuring it’s sufficiently recharged.
Step 3: Shut Off Both Vehicles:
After letting both cars run for a few minutes, shut off their engines. The booster vehicle should be turned off first, followed by the dead vehicle. Electrical surges can potentially damage the vehicle’s electrical systems if this sequence is not followed.
Safety Tips and Precautions
When you follow these safety tips and precautions, jump-starting a car battery can be safe and straightforward:
Avoid Sparks
Sparks should not be created near the battery terminals during the jump-start process. The clamps on the jumper cables should not touch each other or any metal surfaces on the vehicle. Sparks can cause accidents, battery damage, or even explosions.
Do Not Touch Clamps Together:
While jumper cables are connected to a battery, never touch their metal clamps together.
Keep Clothing and Jewelry Away:
While jump-starting a car, wear appropriate clothing, and avoid loose clothing or jewelry that could come into contact with the battery terminals, clamps, or moving engine parts. Accidents can occur when loose items get caught.
Properly Store Jumper Cables:
Jumper cables should be stored in a dry, safe place when not in use. The cables can degrade over time if left in the trunk or under the hood.
Dispose of Old Batteries Properly:
Jump-starting due to a dead battery requires replacing the old battery as soon as possible. Car batteries contain hazardous materials, so dispose of them at a recycling center or an automotive service provider that accepts used batteries. Do not dispose of them in the trash.
Summarizing Up
You won’t save money if you make a little mistake when connecting jumper cables. A small mistake in connecting can cause electrical issues with air conditioning, lights, and other electrical components. You will never encounter anything if you follow my safety tips and steps.
A basic understanding of how to connect jumper cables to the battery is necessary. Jumper cables need to be stored after use for future use.