Do you know how to test timer on dryer? If your dryer isn’t performing as it should, one of the first components to check is the timer. The timer plays a critical role in managing the drying process, ensuring your clothes are dried to perfection without any damage.
It’s common for the timer to fail over time due to wear and tear, leading to issues like under-drying or over-drying clothes. You might find yourself wondering. Don’t worry; I’m here to guide you through it step by step.
A Quick Look
Why Is a Timer Important?
The timer in your dryer does more than just count down the minutes. It controls several crucial functions, including:

NOCO Boost Plus GB40
⭐ 4.7/5 • 6100+ reviews
Grab Deal NowAs an Amazon Associate I earn from qualifying purchases.
- Heating: Activates the heating element to dry your clothes.
- Tumbling: Turn the drum to keep clothes moving for even drying.
- Cool-down: Engages a cool-down period to reduce wrinkling.
When the timer malfunctions, it can lead to problems such as clothes coming out still damp or, worse, the dryer not stopping at all. This can be not only frustrating but also a potential fire hazard.
Understanding the Timer Mechanism
To better grasp how to test a timer on a dryer, it’s helpful to understand how this mechanism works.
The Role of the Timer in a Dryer
- Cycle Control: Determines the duration for each drying cycle based on the fabric type and moisture level.
- Energy Efficiency: A well-functioning timer helps save energy by avoiding over-drying.

Components of a Dryer Timer
The timer is made up of several parts that work together to ensure your dryer operates efficiently:
- Timer Motor: Powers the timer and rotates it through different drying cycles.
- Timed Drying Cams: These advance the timer through set intervals (e.g., regular drying or delicate drying).
- Electrical Contacts: Control electricity flow to the dryer’s components.
- Switches: Activated by the movement of cams, these switches manage heating and tumbling.
Understanding these components can help you identify where things might be going wrong if your dryer isn’t functioning properly.
Technical Considerations To Deal With Dryer
When testing a dryer timer, there are some technical aspects to keep in mind:
- Electrical Specifications: Make sure to know the voltage and amperage ratings for your specific dryer model. This information can usually be found in the user manual.
- Wiring Diagrams: If available, consult the wiring diagram that often comes with your dryer’s manual. It can guide you on which terminals to test and how to connect the multimeter properly.
- Moisture Sensitivity: Be aware that the presence of moisture around the electrical components can affect your readings and pose safety risks. Ensure the area is dry before testing.
- Timer Settings: Different timer settings may show varying readings on your multimeter. Make sure you test multiple settings to get a comprehensive understanding of the timer’s functionality.
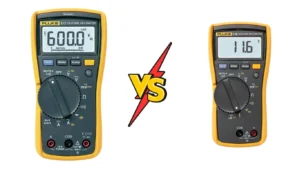
Tools Needed for Testing
Before diving into the process of testing the timer, you’ll need to gather some tools. Here’s what you’ll need:
Essential Tools
- Multimeter: To measure voltage and continuity.
- Screwdriver: For removing panels to access the timer.
- Notebook and Pen: To record findings during your testing.


4. How to Test Timer on Dryer Step-by-Step Guide
Now that you have your tools ready, let’s go through the steps on to test timer on a dryer.

Step 1: Check Power Supply
- Unplug the Dryer: Make sure it’s completely disconnected from power to ensure safety.
- Remove Control Panel:
- Consult Your Manual: Follow the user manual for your dryer model to safely remove the control panel. This might involve unscrewing a few screws or gently prying it off.
- Take Pictures: If you’re unsure about reassembling, take pictures of the wiring before you disconnect anything.

- Use the Multimeter:
- Set it to Measure Voltage: Touch the multimeter probes to the power terminals on the timer.
- Check Voltage:
- Expected Reading: You should see a reading of around 120 volts (for standard dryers).
- No Voltage?: If you don’t get a reading, it indicates a wiring or fuse issue. Check for blown fuses or tripped breakers, as this is a common problem.

Step 2: Evaluate the Timer Motor
- Set the Multimeter to Resistance (Ohms): This checks the motor’s functionality.
- Connect to Timer Motor Terminals: Make sure you touch the probes correctly.
- Expected Reading: Look for a reading that typically falls between 10 to 50 ohms. A reading outside this range indicates potential motor failure.
- Infinite Resistance: If the reading is infinite, it means the motor is faulty and needs replacement. Take note of this as you’ll need a compatible replacement motor.

Step 3: Test Timer Contacts for Continuity
- Set the Multimeter to Continuity Mode: This checks if electrical connections are intact.
- Touch Probes to Timer Contacts:
- Rotate the Timer Dial: While testing, turn the timer dial to different settings to ensure all contacts are tested.
- Expected Results:
- If the multimeter beeps or shows a low resistance reading, continuity is present.
- No Continuity: If you receive no continuity signal or an open circuit, this indicates a faulty timer; you may need to replace it.
Interpreting Test Results
Understanding your test results is crucial. Here’s what different outcomes may indicate:
- Timer Advances Too Quickly: This could signal an electrical issue or a short circuit.
- Timer Advances Too Slowly: Likely a problem with the motor or something obstructing its movement.
- Timer Does Not Advance: Often points to a defective timer motor or mechanical obstruction.
- Timer Not Starting: Indicates a power supply issue or faulty wiring.
Safety Guidelines For Test Dryer Timer
When working with electrical appliances, safety should always be your top priority. Here are essential safety guidelines to keep in mind:
- Disconnect Power: Always unplug the dryer before starting any tests. This is crucial to avoid electrical shocks.
- Use Insulated Tools: Whenever possible, use tools with insulated handles to minimize the risk of electrical contact.
- Work in a Dry Environment: Ensure your workspace is dry to prevent electrical hazards.
- Avoid Loose Clothing: Keep loose clothing and hair away from moving parts.
- Have a First Aid Kit Ready: Always be prepared for any unforeseen accidents.
- Stay Focused: Don’t rush through the testing process. Taking your time ensures accuracy and safety.
Common Timer Issues and Troubleshooting
Common issues can still arise. Here are some frequent problems you might encounter:
- Timer Stops Mid-Cycle:
- Solution: Check the timer motor’s power supply. If the motor works, inspect the control panel for issues.
- Timer Not Advancing Past a Specific Point:
- Solution: Inspect cams and gears for damage or obstructions. Clean any debris you find.
- Timer Operates Erratically:
- Solution: Clean contacts with a contact cleaner or replace the timer switch if cleaning doesn’t help.
When to Call a Professional
If you’ve followed all these steps and the timer still isn’t working, it might be time to call in a professional. Working with electrical components can be dangerous. A professional can ensure that everything is handled safely. Hiring an expert can save you time and stress.
9. Conclusion
Now that you know how to test timer on dryer, you can confidently troubleshoot any issues that arise. Regular maintenance is crucial for the longevity of your appliance, so don’t hesitate to check in on your dryer from time to time. If problems persist or if you feel uncertain about any step, seeking professional help is always a good idea.
With these tips, you’ll keep your dryer functioning optimally and ensure that your laundry routine remains hassle-free.
FAQ’s
- How do you know if the timer is bad on a dryer?
A bad timer may cause the dryer not to start, turn off unexpectedly, or fail to advance through cycles. If clothes come out damp or overly dry, the timer may need replacement. - How do I test a dryer timer with a multimeter?
To test a dryer timer, unplug the dryer and remove the control panel. Set the multimeter to continuity and touch the probes to the timer contacts while rotating the timer dial. Continuity indicates a functioning timer; no continuity suggests it may need replacement. - How can I tell if my GE dryer timer is faulty?
For a GE dryer, unplug the appliance and measure continuity across the timer contacts with a multimeter. If there’s no continuity at any setting, the timer is likely faulty and should be replaced. - Is it safe to test the dryer timer myself?
Yes, it’s safe if you follow safety guidelines: always unplug the dryer before testing and use insulated tools. If unsure, consult a professional. - Can other issues affect the dryer timer’s performance?
Yes, electrical problems like blown fuses or poor ventilation can impact timer function. Regular maintenance can help prevent these issues.