

Electrical problems can be intimidating. Thankfully, checking house fuses is one of the more manageable tasks a homeowner can do. Knowing how to check house fuses in case you experience any electrical issues in your home, like a power outage or flickering lights, is essential. To help make the process as easy as possible, here is a step-by-step guide that will walk you through the process of how to check house fuses.
How To Check House Fuses | Step By Step Procedure
Step 1: Identify Your Electrical Panel
The first step is identifying your electrical panel and locating the circuit breakers or fuses. Many people mistakenly refer to circuit breakers as “fuse boxes” because they look very similar. But there are two different types of panels.
A Quick Look

Circuit breakers contain switches that will trip when an overload occurs to protect your wiring from damage. Fuses are cartridges with metal wires inside that burn out when too much current passes through them. So they must be replaced after use.

NOCO Boost Plus GB40
⭐ 4.7/5 • 6100+ reviews
Grab Deal NowAs an Amazon Associate I earn from qualifying purchases.
Step 2: Check for Tripped Breakers or Blown Fuses
Once you’ve identified which type of electrical panel you have, it’s time to check for tripped breakers or blown fuses. If you have a circuit breaker panel, check each switch to see if it has been tripped and reset them if necessary. If your panel contains fuses, inspect each fuse for signs of wear or discoloration.
These are indications that it has blown out and needs to be replaced with a new one of the same amperage rating (usually 15A or 20A).
Step 3: Reset Circuit Breakers or Replace Fuses
If all of your switches appear to be in the “on” position, then it’s time to reset any tripped circuits by turning them off and then back on again. However, if one or more switches were tripped—or if you have a fuse box. You’ll need to replace any blown fuses with new ones before resetting the switch/fuse box again.
You must only use replacement fuses rated at the same amperage as those already in place. Although, using higher amperage ratings could lead to severe damage!
How to check house fuses with multimeter?
Step#1 Gather Your Tools:

Prepare the necessary tools and equipment before checking house fuses with a multimeter. A digital multimeter, a flashlight, and a flathead screwdriver will be needed. Make sure the multimeter is set to the “Ohms” or resistance mode, which is usually indicated by the Ω symbol.
Step#2 Turn Off Power:
Electrical systems require a high level of safety. Turn off the power to the area where you will be checking the fuses. If you are working on an area that has a main circuit breaker or fuse box, switch off the circuit breaker or remove the fuse.
Step#3 Identify the Fuse Box:
Find the fuse box or circuit breaker panel in your house. You can usually find this in a utility room, basement, or garage. In these areas, there may not always be good lighting, so make use of your flashlight if necessary.
Step#4Access the Fuse:
Take a flathead screwdriver and gently remove the cover of the fuse box or circuit breaker panel. You will be able to see the fuses or circuit breakers that need to be tested this way.
Step#5 Visual Inspection:

Visually inspect the fuses before using the multimeter. Observe for burnt or melted appearances, broken filaments, or discoloration as signs of damage. Replace a damaged fuse with another of the same amperage rating.
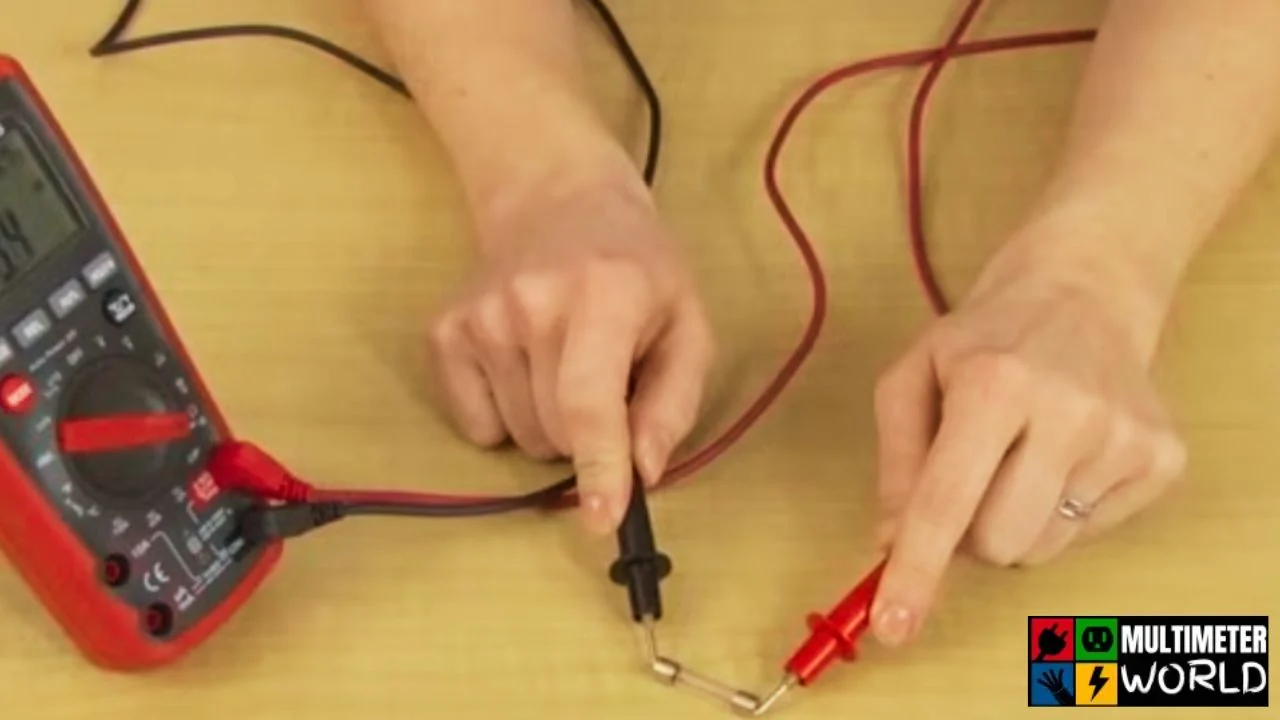
Step#6 Multimeter Setup:
Set your multimeter to the lowest resistance range. Connect the two multimeter probes by touching them together. Touch the red probe to the metal terminal of the fuse. The black probe should be touched simultaneously to the other end of the fuse, making sure it is secure with the metal terminal or conductor.
Step#7 Testing the Fuse:
Touch one probe to each end of the fuse you want to test. Multimeters display resistance values. An intact fuse should have a resistance reading close to zero ohms (Ω). An infinite or high resistance reading indicates a blown fuse.
Step#8 Replace the Fuse:
When the multimeter indicates a blown fuse, turn off the power supply to that circuit, remove the blown fuse, and replace it with a new one of the same amperage rating. Throughout this process, follow safety precautions.
Step#9 Close the Panel:
Fuse boxes and circuit breaker panels should be securely closed after blown fuses have been replaced. To avoid accidents or exposure to live electrical components, make sure it is properly sealed.
Step#10 Restore Power:
Lastly, turn on the main circuit breaker or re-insert the fuse for the area you worked on by returning to the main circuit breaker or fuse box. As a result, power will be restored to that circuit. You should test the affected electrical devices to make sure they are working properly.


How Do You Check House Fuses Without Removing Them?
Checking a house fuse is reasonably straightforward and can be done without removing the fuse from its socket. In this article, we will provide you with a step-by-step guide on how to check house fuses without removing them. By following these steps, you can quickly and easily determine if a faulty fuse needs replacing.

Step 1 – Locate the Fuse Panel

The first step is to locate your home’s fuse panel. This can typically be found in your garage or basement and looks like a metal box with several switches on it. If unsure where the fuse panel is located, check your home’s electrical manual for more information.
Step 2 – Determine which Fuse Needs Testing
Once you have located the fuse panel, identify the switch associated with the appliance or electrical device that isn’t working correctly. You may need to consult your home’s electrical wiring diagram if you are unsure which switch controls which appliance/device. If you wanted to learn Fluke vs klein then,you can click here.
Step 3 – Use a Voltage Tester
To check the house fuses without removing them, use a voltage tester (also known as a multimeter). Plug one end of the voltage tester into an outlet near the fuse panel. Then place it against each switch until it reads “live” (this indicates that current is flowing through that switch). If no current is detected at any of the switches, then there is likely an issue with one or more fuses in your home’s circuit breaker box.
Step 4 – Replace any Faulty Fuses
Once faulty fuses have been identified, replace them as soon as possible, as they may cause other problems if left unchecked. To do this safely, ensure all power sources are turned off before replacing any fuse. Moreover, always wear safety gloves when handling live wires/fuses.
Is A Fuse Good If It Has Continuity?
While having a fuse that reads as having continuity is ideal, it is only sometimes guaranteed to blow. Fuses are designed to be sacrificial parts, meaning they are meant to accept and contain any large surges in power or current above the rated capacity of the fuse.
Therefore, even if a fuse shows up as working on a meter reading for continuity. It may need help to handle more significant or unknown amounts of voltage or current. It is important to remember that continuity alone does not mean that the fuse will protect your equipment from overloads or other types of current issues.
The only proper way to determine if a fuse is performing correctly is to test it under typical conditions, such as its ability to trip when passing current overrated levels.I made the list of best budget multimeters you can check out.
Bottom Line
So, how to check house fuses? Well, checking house fuses doesn’t have to be overwhelming; follow these three easy steps! Start by identifying your electrical panel and locating the circuit breakers or fuses within it. Then check for any tripped or blown fuses before finally resetting them (if necessary).
Once complete, everything should be back up and running again—which means no more worrying about unexpected power outages! Though it’s always best practice for homeowners (and renters) alike to hire licensed electricians for significant electricity projects. This simple task can quickly be completed with just a few tools and patience! Be sure not to skip any steps along the way so that you can ensure accurate results every time!