

A reliable battery charger is essential for keeping your electronic devices powered and ready. Knowing how to test a battery charger with a multimeter is a valuable skill whether you’re a DIY enthusiast, an electrician, or someone who just wants to ensure their gadgets never run out of power. You will be guided step-by-step through this process to ensure that your charger performs at its best.
How to test a car battery charger with a multimeter? Short Guide
Connect the charger to an outlet and plug a battery into it .Set multimeter to DC voltage. Connect red probe to charger’s positive (+) output. Connect black probe to charger’s negative (-) output.Check multimeter for voltage reading. Low volts (e.g., below 11V) indicate weak battery or charger issue. Good volts (around 12.6V) suggest normal charging. High volts (e.g., above 15V) signal potential overcharging.
How do battery charger work?
Battery chargers deliver electrical energy to recharge depleted batteries, such as those in smartphones and cars. It operates through a simple but crucial process. Connecting the charger to the battery converts electrical power from the outlet into a voltage and current suitable for the battery. The adjusted power flows into the battery, causing electric current to flow in the opposite direction to the discharge process, replenishing its energy. To ensure a safe and efficient recharging process, modern chargers include safety features such as overcharge protection.
What are the three types of battery chargers?
There are three types of battery chargers: automatic chargers, solar-powered chargers, and trickle chargers.
- Automatic charger
- Solar powered charger
- Trickle charger
Automatic chargers adjust their charging rates based on the battery’s condition, preventing overcharging and damage. A solar-powered charger uses the power of the sun to recharge batteries, making it an eco-friendly option for outdoor enthusiasts. In contrast, trickle chargers deliver a low, constant current to keep a battery fully charged without overcharging, which is particularly useful for seasonal vehicles and equipment. In addition to offering flexibility and efficiency, these chargers cater to a wide range of needs.
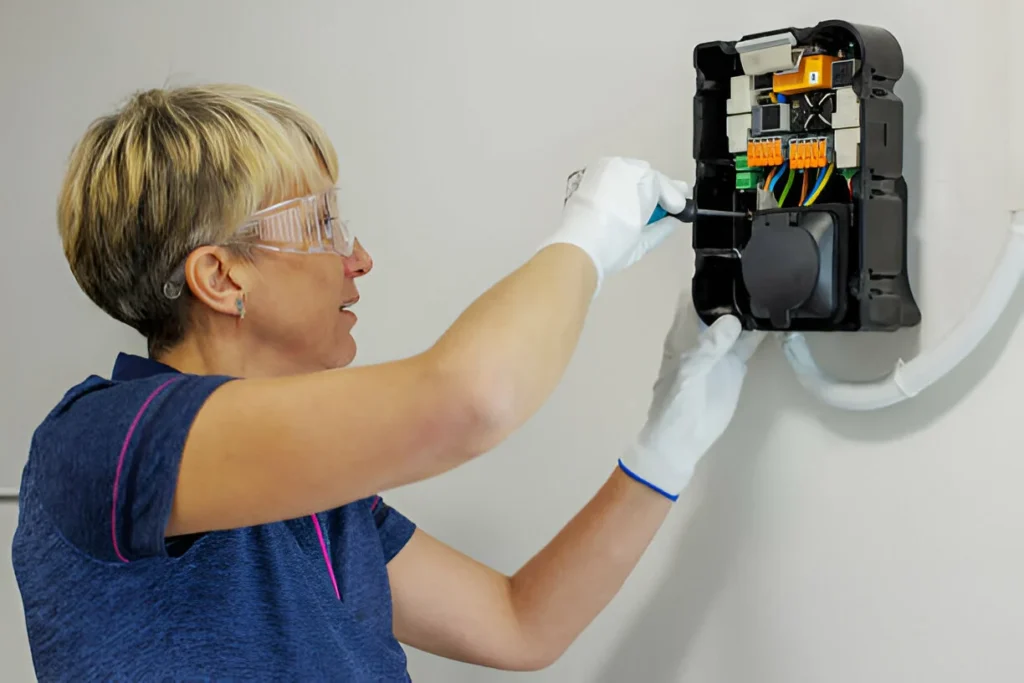
Materials Needed For Testing Battery charger
Before testing a battery charger with a multimeter, you should take the necessary tools.
- Multimeter
- Battery Charger
- Safety Gear
- Power Source
- Wire Strippers and Cutters
- Alligator Clips
- Workbench or Testing Area
How to test a battery charger with a multimeter?
To test a battery charger completely, you should test the charger’s output voltage, current, and continuity. The following is a step-by-step guide to each test.
Step By Step Guide
1-Testing the Charger’s Output Voltage
In order for your devices to receive the proper amount of power, you must understand the voltage output of your battery charger. The following steps will guide you through testing the charger’s output voltage with a multimeter:
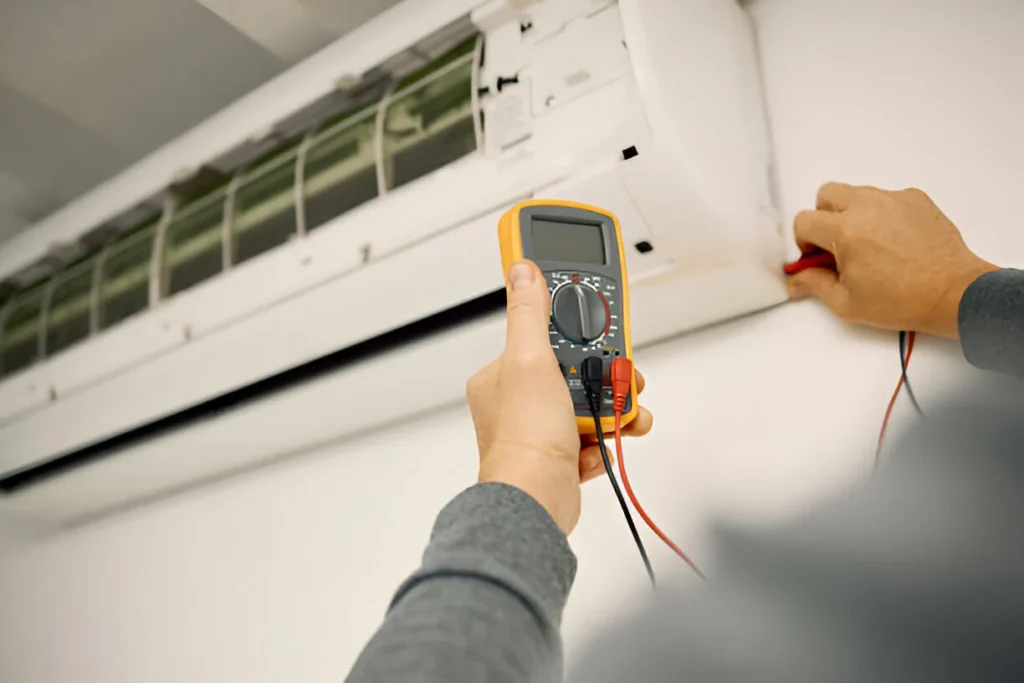
Step#1 Select the Appropriate Voltage Range:
Set your multimeter to the voltage range that includes the expected charger output voltage before you begin testing. If you’re testing a charger that should provide around 12 volts, set your multimeter higher than 12 volts, such as 20V or 50V, to ensure accurate readings.
Step#2 Connect the Multimeter:
The red lead of the multimeter should be connected to the charger’s positive (+) terminal, typically indicated by a “+” or “POS” symbol. The black lead should be connected to the negative (-) terminal marked with a “-” or “NEG” symbol. By using these connections, the multimeter can accurately measure the charger’s voltage.
Step#3 Power On the Charger:
Connect the charger to an electrical outlet and turn it on. Ensure that it is in good working condition. Voltage should now be provided to the multimeter by the charger.
Step#4 Read the Voltage:
Check out the display on the multimeter. The output voltage of the charger will be displayed. Depending on the charger’s specifications, the reading should be within a certain range if it is functioning correctly. A 12-volt charger, for example, should read around 12 volts.
Step#5 Interpreting the Results:
Once you have the voltage reading, compare it with the expected output voltage of your charger. You can trust your charger is providing the intended voltage to your devices if the reading is within a small margin of error (around 5% deviation is acceptable).
2-Checking the Charger’s Current
It is equally important to measure the current output of your battery charger to ensure it can charge your devices. To check the charger’s current with a multimeter, follow these steps:
Step#1 Select the Amperage Range
Start by setting your multimeter to the amperage mode that can accommodate the expected current output of your charger. Select a range on your multimeter that is higher than the expected current if you are testing a charger that should provide.
Step#2 Connect the Multimeter:
Connect the red lead of your multimeter to the charger’s positive (+) terminal, usually marked with a “+” or “POS” symbol. The black lead should be connected to the negative (-) terminal, denoted by a “-” or “NEG” symbol. With this connection, the multimeter can accurately measure the charger’s current.
Step#3 Power On the Charger:
Turn on the charger by plugging it into a power source. In order to measure current, the charger should be actively supplying it.
Step#4 Read the Amperage:
Multimeters display current output in amperes (A); observe the display on your multimeter. Ideally, a charger should provide current close to its rated value, considering a slight deviation as acceptable.
Step#5 Interpreting the Results:
The current reading on your multimeter should match the charger’s specified output. Your charger is likely working correctly if it measures current within a reasonable error margin (usually around 5%).
3-Testing for Continuity
Checking your battery charger’s continuity is a crucial step in making sure it works as it should, since it identifies any breaks or open circuits. Using a multimeter, here’s how to test for continuity:
Step#1 Select the Continuity Mode:
Set your multimeter to continuity mode, which is often represented by a Wi-Fi signal or sound wave.
Step#2 Safety Precautions:
It is always important to prioritize safety. Connect the charger to a power source and disconnect the device from the charger. If necessary, inspect the charger’s cables and connectors for visible damage or wear.
Step#3 Probe Placement:
The probes of the multimeter should be placed appropriately. Test the circuit with the red probe touching one end and the black probe touching the other end. Checking the continuity of the charger cable or connector is often part of charger testing.
Step#4 Testing for Continuity:
Make sure your multimeter is in continuity mode, and touch the probes together to hear a continuous audible signal. It confirms that the multimeter is working properly.

Step#5 Testing the Circuit:
A multimeter should beep continuously if there is continuity in the charger’s circuit (cable or connector), indicating that electricity flows unbrokenly.
Step#6 Interpreting the Results:
A beep indicates continuity, and the charger’s circuit is intact if the multimeter beeps. There might be a break or open circuit if it remains silent.
Step#7 Addressing Open Circuits:
Check the charger’s wiring and connectors for visible damage or loose connections if the multimeter does not detect continuity. The charger must be repaired or replaced if any of its components are damaged. This will ensure continuity and proper functionality.
Safety precautions
Whenever you work with electrical components, you should take safety precautions. A few safety tips are listed below:
1-Proper Equipment Setup
Prepare your battery charger test with the necessary tools and safety equipment, such as insulated gloves and safety goggles. Check the testing equipment for visible damage or defects. When setting up the charger and any associated testing instruments, make sure all connections are secure and follow the manufacturer’s instructions.
2. Electrical Isolation
Be sure to completely disconnect the charger and battery from the electrical supply before connecting them. During testing, this step prevents accidental electrical shocks and potential equipment damage.
3. Well-Ventilated Area
To prevent the accumulation of potentially harmful gases during the charging process, conduct the testing in a well-ventilated area. A proper ventilation system helps disperse fumes, reducing the risk of inhaling harmful substances.
How to diagnosing Charger Issues?
You can fix any problem you notice after knowing how to test a battery charger with a multimeter with this guideline. The following are some common charger issues and their solutions:
1-Charger Not Powering On:
When your charger doesn’t power on, first check the power source and outlet. Check a different outlet to make sure it isn’t a power source problem. The charger may have an internal fault, so you should seek professional assistance if it still doesn’t work.
2-No Output Voltage or Current:
If your multimeter indicates no voltage or current output, inspect the charger’s connections, cables, and connectors for any visible damage or loose parts. Check the charger’s internal components for damage. It may be necessary to replace or repair the charger if the issue persists.
Inconsistent Voltage or Current:
Voltage or current fluctuations may be caused by faulty components or wiring. Check the charger carefully for loose connections or damaged components. Whenever a problem persists, it’s best to consult a professional for an assessment and repair.
Overheating Charger:
During use, if your charger becomes excessively hot, it may be overloaded or experiencing an internal problem. It is important to check the charger’s compatibility with your devices to ensure it is not being asked to supply too much current. Consider replacing the charger with a higher-capacity model or one designed specifically for your device if the problem persists.
Charger Making Unusual Sounds:
Buzzing or crackling sounds may indicate internal problems or loose components. You should discontinue use immediately and seek professional assistance. Safety risks can arise from using a charger that makes unusual sounds.
Incompatible Charger:
The charger should be replaced if it is not compatible with your device if you have determined that it is not compatible. It is possible for your devices to be damaged and safety risks can be posed by using an incompatible charger.
Frayed Cables or Damaged Connectors:
Cables and connectors that are damaged or frayed can hinder the charger’s performance and safety. Maintain a safe and efficient charging process by replacing damaged cables and connectors as soon as possible.
If you want to know How To Use Clamp Meter To Measure Voltage? Read my blog!
Ending Point
I hope you now know how to test a battery charger with a multimeter. You should seek professional help if you notice any damage or signs of a faulty charger. If you have a battery charger issue, the Electricain can fix it for you in a few dollars. The electrician will guide you if you stand with him and ask a question. Next time, you will be able to fix the same battery charger issue with these guidelines.