Marine batteries power various systems on your boat, such as the engine, electronics, and lights. Here we will learn in detail about how to test a marine battery.
Ensure your marine battery is charged. Then, check voltage (12.2-13.4V good). Conduct a load test to mimic real use. Inspect terminals for damage or corrosion. Finally, use a hydrometer to assess acid health.
“To check the charge of the battery, use a multimeter, interpreting the voltage readings and assessing how much charge the battery has. Inspect wiring and fuses on marine battery chargers and use a multimeter to check output, ensure compatibility, and test the output.”
Safety Precautions Before Testing
When dealing with batteries, safety should be your top priority. Precautions to take before testing:
- Ventilation: It is important to perform battery tests in a well-ventilated area to avoid inhaling potentially harmful gasses.
- Protective Gear: Protect your hands and eyes against acid hazards by wearing gloves and safety glasses.
- No Smoking: Do not smoke or use open flames around the battery, as hydrogen gas is highly flammable when it is being charged or discharged.

- Disconnect Load: Before testing, disconnect any gear connected to the battery to avoid electrical hazards.
- Secure Tools: Keep tools and equipment organized and away from the battery terminals to prevent short circuits or accidental sparks.
How to Test a Marine Battery Voltage?
So, How to test a marine battery? In order to evaluate your marine battery’s health and performance, you need to test its voltage. Battery voltage tests provide insight into the battery’s charge level and potential problems. Voltage tests can be performed in two ways: Open-circuit and voltage-drop.
Method0#01 | Open-Circuit Voltage Test of marine battery
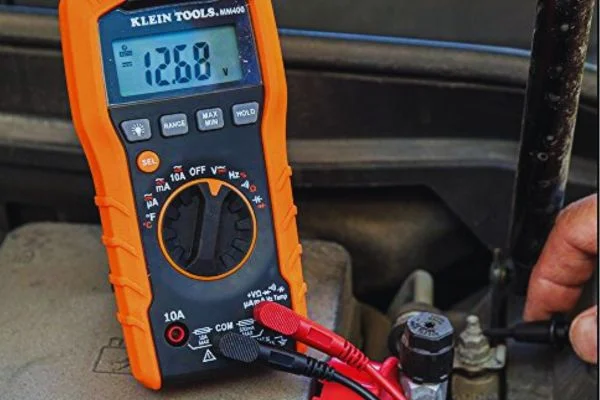
Your marine battery’s charge level can be determined using the Open-Circuit Voltage (OCV) test. You measure the battery’s resting voltage when the battery is not connected to a load or charger. Tests can be conducted as follows:
- Preparation: Disconnect the battery from any circuits and allow it to rest for a few hours to stabilize its voltage.
- Multimeter Setup: Switch your multimeter to DC voltage, usually 20 volts. Connect the meter’s positive (red) lead to the battery’s positive terminal, and the negative (black) lead to the battery’s negative terminal.
- Reading the Voltage: Using the multimeter, record the voltage reading. Battery charge level is reflected in this reading (12.2-13.4V). Assess the battery’s health by comparing it to a reference chart or manufacturer’s recommendations.
Read more about How to check battery amps with a multimeter?
Method0#02 | Voltage-Drop Test of marine battery

By performing the Voltage-Drop Test, you can identify potential problems with your battery’s internal resistance and the integrity of its connections. When the battery voltage drops significantly during a load test, there may be problems affecting its performance. This test can be performed as follows:
- Load Setup: Turn on a significant battery load, such as the boat’s lights or accessories, to cause a moderate battery drain.
- Multimeter Connection: Select DC voltage on your multimeter. It is best to connect the meter’s positive lead to the positive terminal of the battery and the meter’s negative lead to the positive connection of the load.
- Reading the Voltage Drop: Check the voltage on the multimeter while the load is active. Using the Open Circuit Voltage Test, compare this value with the battery’s resting voltage. Resistance issues are present by a noticeable drop.
- Checking Connections: Monitor voltage across various connections and cables during the test. It might be necessary to clean or tighten a specific connection if you notice a substantial drop.
Method 3 | Continuity Test of Marine Battery
Continuity tests determine whether the internal components of your marine battery are in good condition. You can use this test to identify any faults or breaks in the battery that might affect its performance.
- Disconnect the Battery: Unplug the marine battery from all power sources. By doing this, you ensure your safety during the test and prevent accidental shorts.
- Multimeter Setup: Switch your digital multimeter to continuity or ohms mode. In this mode, the multimeter sends a small current through the circuit and measures its resistance.
- Test the Terminals: Connect the multimeter probes to the positive (+) and negative (-) terminals of the battery. If the multimeter shows zero ohms or beeps, the circuit is complete – there is continuity. It indicates a fault or break within the battery if there’s no reading or a high resistance reading.
- Test Internal Components: You can also test the internal components of your battery if it has removable cell caps. The first probe should be inserted into the electrolyte solution of one cell, and the second probe should be inserted into the terminal of the corresponding cell. It shows continuity by a reading close to zero ohms.
- Interpreting Results: When continuity is selected, your battery’s internal circuitry is intact, indicating good health. It is possible, however, that there is a break in the circuit or a faulty internal connection if there is no continuity.
Read more about How to Check Wire Continuity with Multimeter?
Method 4 | Alternator Compatibility Test of Marine Battery
An alternator compatibility test determines whether your marine battery can accept and maintain a charge from the boat’s alternator. When you’re out on the water, this test ensures that the battery can recharge efficiently.
- Engine Off: Disconnect the battery from any external power source and turn off the boat’s engine.
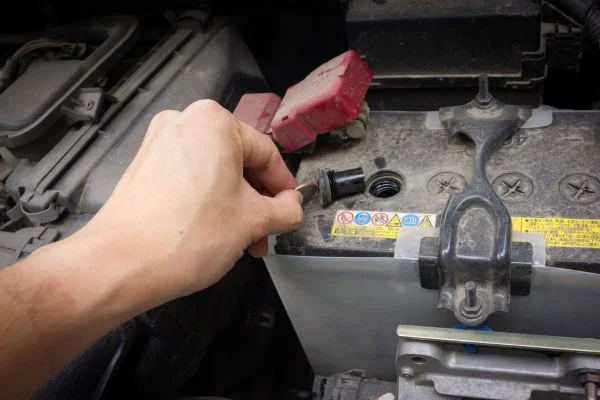
- Access the Battery Terminals: Find the positive (+) and negative (-) terminals on the marine battery.
- Set up the multimeter: If your multimeter does not automatically range, set it to DC voltage mode. Positively connect the red probe to the positive terminal and negatively connect the black probe to the negative terminal.
- Record Initial Voltage: Record the initial voltage reading on the multimeter. A fully charged marine battery typically reads between 12.6 and 12.8 volts.
- Start the Engine: Start the boat’s engine and let it idle for a while. As a result, the alternator can begin charging the battery.
- Monitor Voltage: Observe the multimeter reading while the engine is running. During charging, the alternator should increase the voltage. Voltage readings between 13.8 and 14.4 volts indicate a healthy charging system.
- Interpreting Results: If the voltage steadily increases within the expected range, your battery and alternator are in good condition. However, if the voltage remains stagnant, there may be a problem with the alternator or the battery.
Read more about How to test batteries without a tester?
Method 5 | Visual Inspection and Maintenance of marine Battery

A marine battery’s longevity and reliability aren’t just determined by its electrical parameters; visual inspection and proper maintenance play a crucial role in ensuring that it lasts a long time. it is 5th and last method on how to test a marine battery. The following is a step-by-step guide to visually inspecting and maintaining your marine battery:
- Checking for Visible Damage: Before performing any testing procedures, it is important to visually inspect the battery. Corrosion, cracks, and other issues may occur as a result of regular exposure to the marine environment.
- Inspecting Wiring and Connections: Your marine battery’s wiring and connections are equally important. Voltage drops and unreliable performance can be caused by faulty connections.
- Battery Terminals: Check the battery terminals for tightness and cleanliness. Having loose or corroded terminals can result in poor electrical contact.
- Cables: Check the battery cables for cracks, fraying, or wear. Electricity can be interrupted by damaged cables.
- Connectors: Look for corrosion or oxidation on the connectors. A clean and secure connection ensures optimal performance.
- Tightness: Ensure that the terminal connections are snug but not overtightened. As a result, vibration-related problems are prevented.
Ending point
Maintaining and testing your marine battery is critical to ensuring a smooth and reliable ride. Now you know how to test a marine battery. In addition to technical checks, it is important to keep an eye out for visual clues and maintain your battery properly to ensure longevity and performance.
FAQs About How To Test a Marine Battery
How do I test my marine battery?
Checking your marine battery is a straightforward process. Start by turning off your boat’s electrical systems. Voltage can be measured with a voltmeter. A fully charged marine battery should read between 12.6 and 12.8 volts. The voltage might be significantly lower if the battery is discharged or weak. Using a handheld load tester or a battery load tester, perform a load test. For 15 seconds, apply a load equal to half the battery’s cold cranking amps (CCA). A battery might not be able to sustain power under load if the voltage drops dramatically.
How can you tell if a marine battery is bad?
A bad marine battery can show several signs. It is important to look for a consistently low voltage reading, especially if it fails to hold a charge or drops rapidly under load. Your boat’s accessories might not be powered effectively if your battery is bad. A battery issue could also be indicated by physical signs like leakage, bulging, or a pungent odor of sulfur. It is likely that the battery has degraded if it needs to be recharged frequently or does not hold its charge for a long period of time.
What is a good reading on a marine battery?
A fully charged marine battery should read between 12.6 and 12.8 volts on a voltmeter. It indicates that the battery is healthy and charged. Specific readings, however, may vary slightly based on factors such as battery type and temperature. The battery might be partially or fully discharged if the reading is significantly lower than this range.
How to test a 12-volt deep cycle battery with a multimeter?
Using a multimeter to test a 12-volt deep cycle battery is simple. Set your multimeter to DC voltage. Connect the multimeter’s positive (red) lead to the battery’s positive terminal, and its negative (black) lead to the battery’s negative terminal. Take a reading of the voltage. Fully charged 12-volt deep cycle batteries should read between 12.6 and 12.8 volts. Discharge might be indicated by lower readings.
Related Posts
