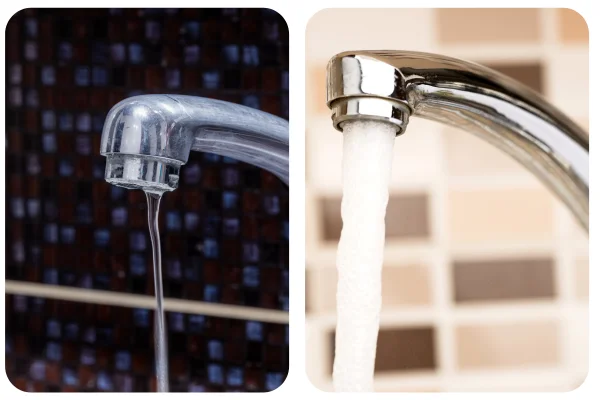
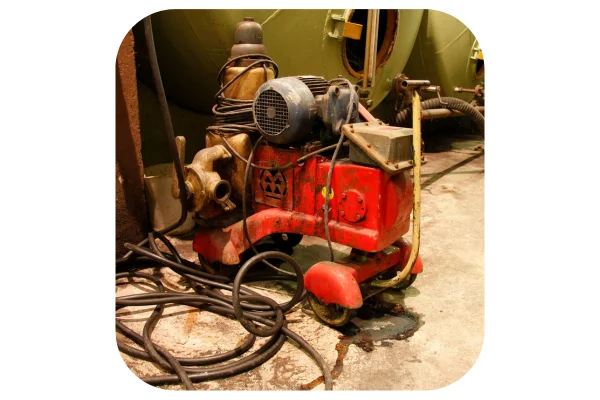
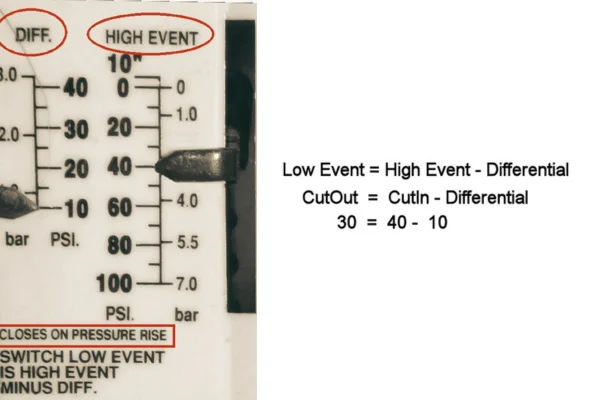
“Wells pressure switches are no different than any other pressure switch. So here we will learn how to test a well pressure switch with a multimeter and physically also.” A well pressure switch is a crucial component of a residential well water system, which maintains water pressure and helps the system function properly. Switches like this monitor the pressure within the water tank and activate the pump to keep the household plumbing at a consistent pressure.
Testing a well pressure switch in 2024 involves various methods. From manual pressure checks to using multimeters, understanding these techniques ensures accurate diagnosis and troubleshooting of well system issues for reliable water supply management.
Typically, pressure switches are found in well systems that use a private water source, such as a well or a cistern. It is common for these systems to be used in rural and remote areas where access to municipal water is limited. Homeowners can save time, money, and inconvenience by knowing how to test and troubleshoot a well pressure switch.
Importance of a Well Pressure Switch
Well pressure switches ensure that water is readily available when faucets you open by automating the water supply process. Well water systems require a functioning pressure switch for a number of reasons, 4 Major reasons are below:
1. Maintaining Optimal Water Pressure:
Pressure switches maintain water pressure within a safe and effective range. They activate the pump when pressure falls below a set level, pressurizing the system, and deactivate it when the desire pressure is on. This ensures consistent water flow for various household activities like showering or lawn watering.

2. Preventing Pump Damage:
Without a pressure switch, the pump would continuously run, leading to premature motor wear. Controlling the pump’s operation via the pressure switch prevents unnecessary strain, thus extending the pump’s lifespan.

3. Energy Efficiency:
Energy efficiency is enhanced by a properly functioning pressure switch. A continuously running pump consumes more energy than one that only runs when necessary.
4. Water Conservation:
A malfunctioning pressure switch could cause the pump to cycle frequently, resulting in water waste. Homeowners can reduce water waste and contribute to environmental conservation by promptly addressing pressure switch issues.
Components of a Well Pressure System
Water supply is ensured consistently and reliably by a well pressure system. Testing a well pressure switch with multimeter requires an understanding of these following components.
Well Pump: Pumps draw water from the well and send it to pressure tanks, the heart of the system.Pressure Tank: When you turn on the faucet, this tank stores water under pressure, so it is readily available. Furthermore, it keeps the system’s pressure consistent.Pressure Switch: A pressure switch monitors the water pressure in the system. By adjusting the cut-in pressure and cut-out pressure, the pump can be controlled when it turns on and when it shuts down.Pressure Gauge: The pressure gauge displays the system’s current water pressure. Potential problems can be diagnosed with this tool.Check Valve: Water cannot return to the well after it has been pumped into the pressure tank from the pump through this valve.Pressure Relief Valve: It prevents damage to the system by releasing excess pressure. In order to maintain the integrity of the system, it is essential.Pipes and Fittings: Water flows smoothly through the system thanks to a number of pipes and fittings.How the Pressure Switch Works?
It is impossible to understand how to test a well pressure switch unless you are familiar with how it works. An important component of a well pressure system is the pressure switch. The pump is activated or deactivated based on the water pressure. The switch has two pressure settings: cut-in and cut-out.
At this lower pressure setting, the pump is triggered to start. The pressure switch detects when the pressure drops below this level (due to water usage) and activates the pump to replenish the pressure tank.
At this pressure setting, the pump is signaled to stop by the pressure switch. When the water pressure reaches this level, the pressure switch instructs the pump to stop until the pressure decreases again.
Common Signs of Pressure Switch Issues
To regulate the pump’s operation based on water supply system pressure changes, a well pressure switch is necessary. However, like any mechanical device, pressure switches can develop issues over time. Early detection of these problems is crucial to prevent them from worsening. Several common signs indicate a malfunctioning well pressure switch:
1. Reduced Water Flow:
If faucets and fixtures provide less water than usual, a faulty pressure switch may be the cause. It might not activate the pump correctly, resulting in inadequate water delivery, especially when using multiple water sources simultaneously.
2. Inconsistent Water Pressure:
Fluctuating water pressure may signal a malfunctioning pressure switch. Sudden variations in pressure without an apparent cause can disrupt daily routines and be frustrating for users.
3. Frequent Pump Cycling:
A pressure switch activates the water pump when pressure drops below a set level (cut-in pressure) and deactivates it when pressure rises (cut-out pressure). If the pump cycles on and off frequently, it could indicate a problem with the pressure switch. This cycling strains the pump unnecessarily and wastes energy.
Tools You’ll Need
Before knowing how to test a well pressure switch, you must understand what tools you need to perform this Well pressure switch testing.
Ensure a smooth and accurate process by gathering the necessary tools before you begin testing your well pressure switch. Having the right tools at your disposal will help you perform the tests accurately and safely. Here’s a list of tools you’ll need for testing a well pressure switch:
- Multimeter
- Screwdriver Set
- Pressure Gauge
- Bucket or Container
- Safety Gear (Gloves, Goggles)
- Teflon Tape
- Flashlight
- Labels or Marker
- Pen and Paper
- User Manual or Documentation


Safety Precautions:
- If you want to start any work on the well pump, make sure it is turned off before you begin. Electrical hazards can be avoided by preventing accidental activation during maintenance.
- Open a faucet or hose bib downstream from the pressure tank to relieve pressure. This minimizes the chance of injury from sudden water discharge.
- Protect yourself from debris, water, and electrical components by wearing appropriate safety gear, such as gloves and safety glasses.
- Be sure to use tools that are designed for electrical and plumbing work. To avoid mishandling, familiarize yourself with their proper usage and safety guidelines.
- Maintain a dry, well-lit work area. It is easier to concentrate on your task when you work in a clean, organized environment.
Step-by-Step Guide to Testing a Well Pressure Switch with Multimeter
Water flow and pressure issues can be caused by a malfunctioning well pressure switch. Follow this step-by-step guide to test your well pressure switch to ensure everything is working properly.
Step 1: Shutting Off Power
Turn off the well pump before you work on the pressure switch. To prevent electrical accidents, locate the circuit breaker or switch that controls the pump’s power supply and shut it off.
Step 2: Draining Water Lines
Open a faucet at the highest point in your home to release any built-up pressure in your system. Let the water run until it stops flowing. It is essential that you follow this step when working on the pressure switch to ensure your safety.
Step 3: Accessing the Pressure Switch
The well pressure switch is usually located near the pressure tank or on the water line. The internal components of the pressure switch can be accessed by removing the cover of the housing carefully. Tools such as a screwdriver might be needed for this task.
Step 4: Testing for Continuity
Using a multimeter set to the continuity (or resistance) mode, test the continuity of the pressure switch terminals. Touch the multimeter probes to the terminals labeled “NC” (Normally Closed) and “NO” (Normally Open). If there’s continuity when the pressure switch is in its resting state, and no continuity when it’s activated, the switch is functioning correctly.

Step 5: Testing Cut-In and Cut-Out Pressure
There are two pressure settings available on the pressure switch: cut-in and cut-out. A pump’s cut-in pressure is the pressure at which it starts, and its cut-out pressure is the pressure at which it stops. By using a pressure gauge, determine what pressure turns the switch on and off.
Cut-in pressure should be around 20 psi less than cut-out pressure. If the pressure settings are incorrect, they may need to be adjusted. Consult the instruction manual for an accurate reading of pressure.

Step 6: Interpreting the Results
Based on your tests, you’ll encounter one of three outcomes:
- Both cut-in and cut-out pressures are accurate: Your pressure switch is functioning correctly.
- Cut-in pressure is too high or too low: Adjust the pressure setting as needed to ensure proper pump activation.
- Cut-out pressure is incorrect: This might indicate a faulty pressure switch that needs replacement.
- Hopefully now you have a clear idea about how to test a well pressure switch.
3 Major Potential Problems of Well Pressure Switch
Identifying a Faulty Pressure Switch
It is possible for your water system to suffer from a range of problems when the pressure switch in your well isn’t working properly. You can confirm the pressure switch’s condition by taking several steps if you suspect it is the culprit.
The first thing you should do is look for visible damage or corrosion on the pressure switch housing. Its performance can be greatly affected by any physical damage. Additionally, listen closely for clicking sounds when the switch should activate, as a lack of clicking could indicate an internal problem.
Testing the Pressure Tank
It is possible for a malfunctioning pressure tank to mimic the symptoms of a faulty pressure switch. Perform a simple test to determine if the pressure tank is to blame.
The pump should be turned off first.
After that, open a faucet until no more water is coming out of the tank. Reconnect the power and close the faucet. As the pump fills the tank, listen to it.
When the pump cycles rapidly (turns on and off quickly), there might be a problem with the pressure tank, such as a loss of air pressure.
Checking for Air Leaks
It is possible for air leaks in the well system to cause irregular pressure readings and cause the pressure switch to malfunction. Look for signs of moisture in the system’s pipes, joints, and connections when the pump is running to identify air leaks. Keep an eye out for any leaks, as even a small one can cause serious problems.
FAQs About How to test a Well pressure Switch
Why is my well pressure switch not working?
Several factors can cause a non-functional well pressure switch. Electrical problems like blown fuses, tripped circuit breakers, or faulty wiring may be to blame. Wear and tear on switches over time or sediment buildup can also affect performance. Diagnosing the exact issue is crucial for finding the right solution.
How does a well pressure switch work?
Well pressure switches monitor the water pressure in a water system. Pressure is sensed by a diaphragm or bellows. The switch activates when the water pressure drops below a certain level (cut-in pressure), completing an electrical circuit and turning on the well pump. A predetermined level of pressure (cut-out pressure) triggers the switch to deactivate, interrupting the circuit and stopping the pump. By cycling on and off, the system maintains the desired water pressure.
How do I reset my well pressure switch?
To reset a well pressure switch, follow these steps:
- Turn off the power to the well pump to ensure safety.
- Locate the pressure switch and identify the reset lever or button.
- Press the reset lever or button firmly and hold it for a few seconds.
- Release the reset lever or button.
- Turn the power back on to the well pump.
- Monitor the system to ensure that the pressure switch resets and operates correctly.
How do you clean a well pressure switch?
Cleaning a well pressure switch can help maintain its proper functioning. Here’s how:
- Turn off the power to the well pump.
- Disconnect the wires from the pressure switch terminals.
- Gently remove the pressure switch cover or housing.
- Inspect the interior for dust, dirt, or debris.
- Use a soft brush or compressed air to carefully clean the components.
- Pay attention to the diaphragm, contacts, and other moving parts.
- Reassemble the pressure switch cover and reconnect the wires.
- Turn the power back on and observe the switch’s operation.
Wrapping Up
In wrapping up our exploration of how to test a well pressure switch, it’s clear that a well-functioning pressure switch is the linchpin of an efficient water system. You’ve gained insight into maintaining a healthy water flow by understanding the components of the system and troubleshooting potential problems.
Maintaining your pressure switch regularly will extend its lifespan and ensure uninterrupted water supply. You can confidently address pressure switch matters and maintain your household water system for years to come by following these tips.
Best of Luck!

