Home » Guides » How to test car charging system with multimeter?

How to test car charging system with multimeter?

By shafiq usama

How to test car charging system with multimeter

As an electrical engineer, I love explaining how things like circuits and electronics work. I write on my blog to share simple explanations, reviews, and useful tips about the latest technology.

Testing your car's charging system is a fairly easy process that can help you diagnose problems with the alternator, voltage regulator, or battery. By using a multimeter, you can measure the voltage and current flowing through the system. These measurements help in troubleshooting issues with your car system. Here I will tell you how to test car charging system with multimeter.

What is a multimeter and how does it work?

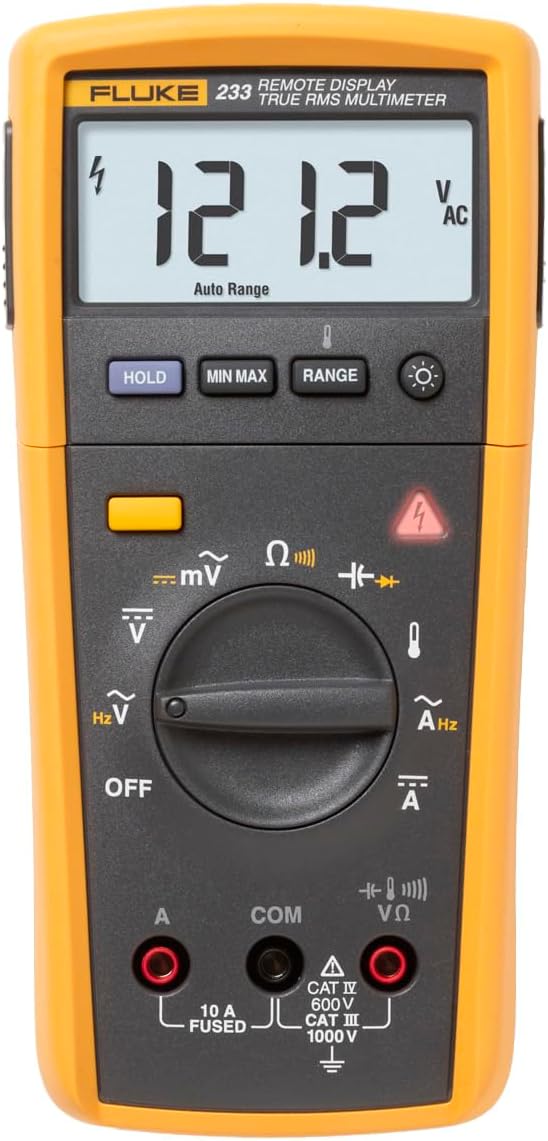
A multimeter is an electronic device used to measure voltage, current, and resistance. It has a number of jacks or probes that can be attached to electrical connectors to take readings. Multimeters come in a variety of shapes and sizes and can be purchased for fairly cheap. 


Best Multimeter For Automotive


Common problems that can occur with a car's charging system

1-Alternator not charging

There may be a problem with the alternator. Alternators in cars may need periodic maintenance or even need to be replaced at times. Usually, electric motors stop charging batteries when the carbon brushes or the alternator’s motor themselves wear out. A blown fuse or bad wiring can also lead to this issue.

2-Battery voltages too low

Several factors contribute to low system voltage, including old age, a poor connection between the battery terminals, or an under capacity alternator. An old age battery or alternator both can cause low or no voltages. 

How to test car charging system with multimeter

3-Car Batteries failure

In such cases the fault is obvious. If this is the issue then all you have to do is to replace your existing poor battery with a new one. You can easily test any battery by an automotive battery tester or automotive digital multimeters. If the battery voltage drop below 11V then it's the time to get new batteries. 


How to test car charging system with multimeter?  Complete Guide

Testing a car charging system requires a bit knowledge. Breaking this guide into 10 easy steps, I have made it a lot easier for you. So, Let's get started!

How to test car charging system with multimeter
  • Disconnect the battery negative cable from the battery terminal.
  • Attach the black probe of the multimeter to the negative terminal of the battery.
  • Attach the red probe of the multimeter to the positive terminal of the battery.
  • Turn on the multimeter and set it to the voltage setting.
  • The multimeter should read around 12 volts. If it does not, then there is an issue with the charging system.
  • Next, attach the probes to the alternator output terminal and the battery positive terminal.
  • Turn on the multimeter and set it to the amperage setting.
  • The multimeter should read between 0 and 2 amps. If it does not, then there is an issue with the charging system.
  • Repeat the same steps for the voltage regulator by attaching the probes to the input and output terminals.
  • The multimeter should read a voltage of around 5 volts. If it does not, then there is an issue with the charging system.
  • By testing the charging system with a multimeter, you can easily diagnose problems with the alternator, voltage regulator, or battery.
  • There might be chances of blown fuses. In such a case, check all the fuses in the charging system and replace any that are blown.
  • If there is still an issue with the charging system, then it will need to be replaced or repaired.
  • Last but not the least, never assume no load voltage as the final accurate value. But on load voltages are always a bit lesser than no load voltages.

I hope this article was helpful in teaching you how to test a car charging system with a multimeter.


How to fix common problems with a car's charging system? Expert Guide

How-to-test-car-charging-system-with-multimeter
  • Loose connections may also cause charging issues. Therefore, Always check those battery terminal connections and all other connections are tight enough.
  • If the voltage is too low, then the battery might need to be replaced.
  • It might be possible that the alternator is not charging. In such cases, it's better to replace the alternator.
  • Batteries of cars require periodic maintenance and need to be replaced after a couple of years. If the battery is not holding a charge, then the battery might need to be replaced.
  • If the voltage regulator is not working properly, then the voltage regulator might need to be replaced.
  • Do check your car fuse box. If there are blown fuses in the charging system, then the fuses will need to be replaced.

Tips for keeping your car's charging system in good condition

  • Clean the battery terminals and connections regularly to prevent corrosion.
  • Check the belt that drives the alternator for wear and tear, and replace it if necessary.
  • Have the charging system checked by a mechanic every few months to make sure it is in good working condition?
  • Keep an eye on the dashboard gauges and lights, and take your car to a mechanic if any warning lights come on.
  • By following these tips, you can keep your car's charging system in good condition and avoid issues with it.

Safety Guide while checking your car charging system

Safety Guide while checking your car charging system
  1. Always disconnect the battery negative cable from the battery terminal before checking the charging system.
  2. Be sure to wear safety goggles and gloves when checking the charging system.
  3. Never touch any of the electrical connectors while the engine is running.
  4. Make sure the multimeter is set to the correct voltage and amperage settings before taking measurements.
  5. If there is any problem with the charging system, and you don't know how to fix it then take your car to a mechanic for repair.

Ending Up

The purpose of this article is to teach you how to test your car's charging system with a multimeter. By following the steps in this article, you should be able to identify and fix many common problems with your car's charging system. If you’re unable to find the cause then you need a professional mechanic now.

This article can help your friends and family learn how to test a charging system in their cars, too. If you don't have a multimeter right now then you can check my list of best automotive multimeters.


FAQs- Frequently Asked Questions

What should the multimeter read when testing the charging system?

The multimeter should read between 0 and 2 amps when testing the charging system. There must be some voltages ranging from 11.8 to 13.2 volts in your car charging system.

What is the cause of low voltage in a car's charging system?

The low voltage might be caused by a bad battery, loose connections, or a faulty alternator.

What is the cause of high voltage in a car's charging system?

High voltage might be caused by a faulty voltage regulator.

How can I fix a problem with my car's charging system?

There are several ways to fix common problems with a car's charging system. Some of these include cleaning the battery terminals, replacing the belt that drives the alternator, and checking the voltage of the alternator. If the engine running smoothly but the alternator is not functional then check the belt. There might be a chance that belts are loose.

What is the best way to find electrical wiring problems in my car?

To locate electrical wiring faults, use a multimeter to test the voltage and resistance of different wires in the circuit. If there is a huge resistance or infinite resistance(in megaohms) then you should replace that specific wire. You can also check the continuity of wire by multimeter continuity function.

What is the reason for corrosion on car battery terminals?

A battery corrodes when hydrogen gas is released from the sulfuric acid inside. By reacting with the ambient atmosphere, the gasses begin to generate corrosive conditions. Mostly this corrosion happened on the negative battery terminal.