Electric stoves offer convenience and precision, but you have to make sure they’re connected to a reliable power source before you start cooking. So, how to install an electric stove outlet? Whether you’re a seasoned DIYer or not, this guide will show you how to install an electric stove outlet.
As we continue to work our way through the installation process, I will break down the requirements, safety measures, and essential tools you will need. The National Electrical Code (NEC) outlines security guidelines for installing stoves and I will assist you in understanding the electrical specifications, and guidelines set by the code.
A Quick Guide About How To Install An Electric Stove Outlet
Get what you need: A circuit breaker, cables, electrical box, wire strippers, screws, and a power cord. Turn off your home’s power and double-check with a voltage tester.
Make sure everything’s set up right: Mount the circuit breaker, position the electrical box, and wire the outlet. If your stove has a power cord, wire it correctly with 3 or 4 prongs. Test the new outlet, turn the power back on, and check everything carefully.
Electric Stove Outlet Requirements and Wiring
Before you start installing, it’s essential to familiarize yourself with the electrical requirements and wiring of the electric stove outlet. Ultimately, a successful installation hinges on understanding the electrical specifications and the differences between types of stoves.
Want to know how to test an Outlet with multimeter?
Voltage and Wiring Specifications for Electric Stoves
The power required by electric stoves is usually provided by a dedicated circuit with specific voltage and wiring specifications. In comparison to household outlets, electric stoves typically operate on 240 volts rather than 120 volts. The higher voltage allows electric stoves to produce the necessary heat for cooking efficiently.
Generally, you’ll encounter two wiring options: A 3-wire configuration or a 4-wire configuration. Also, this configuration depends on whether your stove uses a 3-prong or 4-prong plug. Specifically, a 3-wire setup includes two hot wires and a neutral wire, while a 4-wire setup adds an additional ground wire for enhanced safety.
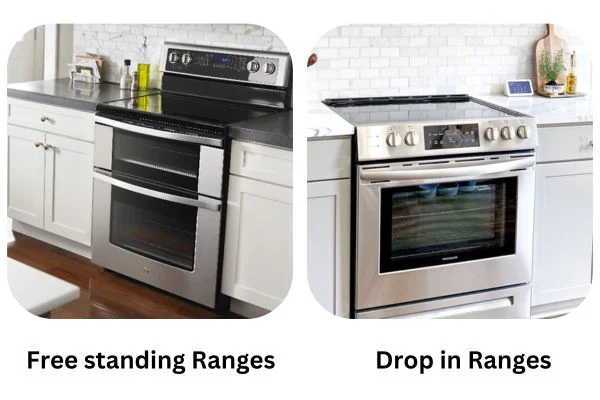
Differentiating Freestanding vs. Drop-In Electric Ranges
Before proceeding, identify whether you have a freestanding or drop-in electric range.
- Freestanding ranges are finished on the sides and have controls on the backsplash, allowing them to be used independently.
- Drop-in ranges are installed between cabinets and require additional customization. Your range type will affect how you position the outlet and electrical box during installation.

It’s important to review the installation instructions and specifications of your electric stove. To ensure compatibility and safety, you should select the appropriate wiring, circuit breaker size, and outlet type.
If you consider these requirements and wiring considerations, you’re well on your way to installing an electric stove outlet.
Step-by-Step Installation Guide About How To Install an Electric Stove Outlet
You have reached the heart of our guide to installing electric stove outlets. We’ll walk you through every step of the installation process, making sure that you’re well-equipped to connect your electric stove safely and efficiently. It’s time to roll up our sleeves!

Step 1: Required Tools for Installing Electric Stove Outlet
Here are the tools you’ll need for the installation process. Have these on hand:
- Screwdrivers (flathead and Phillips)
- Wire strippers
- Needle-nose pliers
- Digital Multimeter
- Cable connectors
- Cable staples
- Wire nuts
- Drill and appropriate bits
- Electrical tape
- Measuring tape
Want to Get Best Outlet Testers for Outlet Testing?
Step 2: Ensuring Safety – Shutting Down Home Electricity
Safety is of utmost importance. To begin, turn off the electricity in the area where you plan to work. Your home’s main electrical panel should have a circuit breaker for the kitchen, so locate it and turn it off. Check that the power is off with your multimter before moving forward.
Step 3: Installing Circuit Breakers, Cables, and Outlets
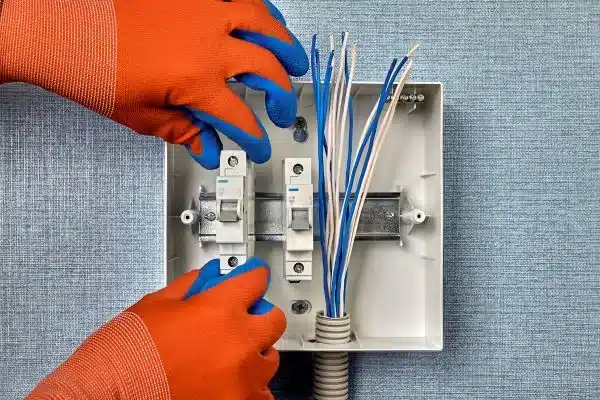
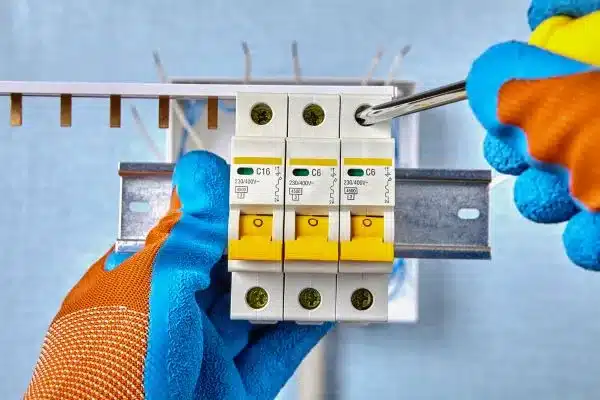
Here is where the real work begins. Mount the circuit breaker panel near the stove’s location. The stove’s power cable should be accessible and within reach of the location.
Securely Mounting Circuit Breakers
Install the circuit breaker panel securely using your drill and appropriate bits. A good anchor and level installation are important.

Choosing and Installing Appropriate Cables
Choose a cable that meets the power requirements of your stove. Electric stoves typically require 240-volt, 40-ampere cables with three conductors: phase, neutral, and ground. You should route the cable from the circuit breaker panel carefully to the stove’s location, ensuring it is not exposed.
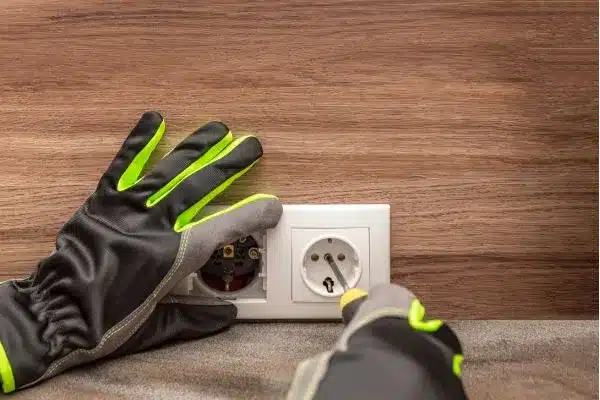
Step 4: Installing the Electric Stove Outlet

- Place the outlet near the electric stove so that it is easy to access.
- The power cord should be able to reach the stove without strain or tension.
- Placement should be based on both convenience and aesthetics.
- Make sure the electrical box you select can accommodate a 240-volt, 40-amp outlet.
- Securely anchor the box to the wall, ensuring it is level and well-anchored.
- Remove the outer insulation from the power cable, revealing the phase, neutral, and ground wires.
- For a secure seal, pass the wires through the electrical box’s cable connector.
- Connect the wires to the outlet terminals:
- Attach the phase (hot) wire (often black or red) to the brass or gold terminal.
- Connect the neutral wire (typically white or gray) to the silver terminal.
- Secure the ground wire (usually green or bare) to the green terminal.
- To ensure tight and well-insulated connections, use wire nuts.
- Make sure the wires are in the electrical box gently, without crowding it.
- Use the provided screws to secure the outlet to the box.
- Verify that there is no electrical current flowing through the outlet using a multimeter.
- You should secure all wires, so double-check your connections.
- Visually inspect the system for exposed wires, loose connections, and signs of damage.
Congratulations! Your electric stove outlet installation has been successfully completed.
Adhering to NEC Rules and Regulations
When installing an electric stove outlet, it’s essential to follow National Electrical Code (NEC) guidelines for safety and compliance. Here’s a quick overview:
Cable Size and Ampacity: To handle the load safely, use a circuit with 240 volts and 40 amps.
Proper Grounding: Circuit breakers and outlets should be connected to the ground wire to prevent fires and shocks.
Outlet Positioning: To ensure safety and easy access, mount the outlet around 18 inches above the floor.
GFCI Protection: GFCI protection can assist in detecting and interrupting faults quickly, particularly in wet locations. Your electric stove outlet installation will be compliant with industry standards by adhering to these NEC rules.
Testing, Safety Checks, and Troubleshooting for Stove Outlet
Once you’ve completed the installation process, ensure everything is working as it should and address any potential issues. Now that we have tested and checked to make sure everything works properly, let’s transition to troubleshooting and safety checks.
1. Initial Tests After Plugging In the Electric Range
Once the outlet is securely installed and the stove’s power cord is connected, it’s now time to plug in your electric range. Make sure it’s properly aligned with the outlet before sliding it in place. Consequently, the control panel should light up and display relevant information once plugged in, confirming that the stove receives power.
2. Double-Checking Connections and Functionality
You should carefully inspect all connections, including those within the circuit breaker panel. It is important to secure the wires and ensure that there are no exposed conductors. Verify that the burners and oven on the stove heat up as expected. Always remember to turn off the stove if you notice any irregularities.
3. Addressing Common Challenges and Troubleshooting Tips
Even with careful installation, you might encounter challenges. Here are some common issues and how to troubleshoot them:
- No Power: Double-check the circuit breaker to ensure it is on if your stove isn’t receiving power. If power is not reaching the stove, check the outlet with a voltage tester. Alternatively, you may need to recheck your wiring connections.
- Uneven Heating: It is possible that faulty wiring or internal components are causing your burners or oven to not heat evenly. Identifying and resolving the problem may require the assistance of an electrician.
- Tripped Breakers: A circuit breaker that consistently trips while using the stove could indicate an overload. Make sure that the stove’s power requirements match the circuit’s capacity. Upgrade the circuit if necessary.
- Sparks or Smoke: Fires and smoke should be extinguished immediately if they appear. The stove should be turned off and disconnected from the power source. Fix any loose connections or damage to the wiring.
Hopefully you know now how to install an electric stove outlet. However, you should always seek professional assistance if you are unsure about any aspect of troubleshooting or encounter a situation beyond your expertise. The safety of you and your home is paramount.
Wrapping Up About How To Install an Electric Stove Outlet!
By following our comprehensive guide, you’ve set up an electric stove outlet in your kitchen, prioritizing safety and effectiveness. Creating a smooth cooking environment starts with planning, following NEC guidelines, and addressing issues. Enjoy your new outlet, but don’t forget safety and expert help when you need it.
FAQs about How to Install an Electric Stove Outlet: A Comprehensive Guide
Q: What kind of outlet is needed for an electric stove?
A: 240-volt outlets are required for electric stoves. A stove’s higher voltage and power requirements require this outlet.
Q: Can you plug an electric stove into any outlet?
A: No, you can’t plug an electric stove into any outlet. The stove’s power demands require a dedicated 240-volt outlet with the appropriate wiring and circuit breaker.
Q: How do you plug in an electric stove?
A: A certified electrician must install a dedicated 240-volt outlet before you can plug in an electric stove. In order to hook up the stove to this outlet, the power cord must be properly connected to it.
Q: Can I install my own electric stove?
A: Electric stoves can be installed by some individuals on their own, but it is recommended that they be installed by a certified electrician. A professional ensures proper wiring, safety measures, and compliance with codes and regulations during electrical work, which can be complex and potentially dangerous.


