All of your car’s electrical wiring is directly connected to multiple relays. These car relays perform particular functions. Likewise, all of these relays have special functions. If each of the relays stops working, then the associated part will be disabled or start malfunctioning. That’s why you need to know how to test car relay with multimeter and without it. Budget is always a major concern for professionals. If you want best multimeters under 100 dollars then you can also find them easily here.
Before testing any car relay, you must know the usage of a multimeter. Here you have two types of multimeters, Analog multimeter, and Digital Multimeter. Digital multimeters have an LCD on which you can see the respected values in digits. Similarly, in analog multimeters, there is no LCD but a needle with a printed background chart.
What is a Relay, and How does it work?
“A relay is an automatic electromagnetic on/off switch.” You can control it with an electrical signal. The electrical signal can be manual or from your car controller.
If we talk specifically about a car relay, it has 5 terminals, 85 and 86, for power supply, and the remaining three are used for control signals. The 87A and 30 are Normally closed points, whereas 87 and 30 are generally open points. This is because when applying the voltage across power terminals, the normally open point will be closed and complete the circuit.
Steps to test car relay with multimeter
- First of all, open your relay or fuse box and do a physical inspection.
- If you don’t find anything fishy, then turn on the ignition switch. Still not seeing any change?
- Now it’s time to use your digital multimeter.
- Keep the ignition switch on and set your multimeter to Voltages.
- Now attach one black test lead to the body of the car and the other test lead to each relay output.
- The relay which is not passing voltages through the normally closed point is at fault. Congrats, you have found the faulty relay.
- Now take out the relay from the relay box and directly applies the voltages.
- And check continuity between normally closed points. If the continuity breaks, then replace the faulty relay.
- Another tricky thing that can happen is carbon on the relay base.
- Turn the ignition off and rinse the base of the relay box with a contact cleaner. When it completely dries, take the new relay and fix it.
- Your car is ready to fly.
Safety Guide

Wear the safety gear
Always make a habit that before starting any electrical testing, wear safety gloves and safety glasses. While testing relays, you don’t know which relay is passing current, so don’t touch the terminal naked-handed.
Don’t reuse
If you have found out that your relay is faulty, then don’t use any pre-used relay. Because most of the time, recycled relays cause a spark or disturb the whole car’s electrical wiring.
Multimeter calibration
Always make sure that your multimeter is well calibrated. The most common issue faced by automotive electricians is that their testing tools are used roughly. This rough usage can cause damage to internal circuitry. If you have dropped your multimeter, then you must check its calibration. The calibration checking is straightforward: measure the voltages in a nearly known power socket or check the continuity of any dead naked wire. If the results are satisfactory, then you’re good to go. If you’re a fluke lover then i have made a list of most precised fluke multimeters for you.
Read the user manual
If you don’t know anything about relay testing or cannot find the relay’s pinpoint location, then read the user manual carefully. Hopefully, you will find a list of solutions on it.
Direct looping
If you are stuck in some deserted place, you can directly jump the wires between normally open points of your relay base. And later on, after reaching your garage, you can replace the car relay.
Check the coil power.
Sometimes you see that physically the relay looks pretty well, but sometimes it starts missing. To check its coil power, you can check the resistance of the coil. If the resistance is more than adjacent relays, then you should replace it.
Importance of multimeter in your toolkit
In electrical troubleshooting, you rely primarily on electrical testers. If you talk about electrical testers, then a digital multimeter is best among all. Being an automotive technician, I always have DMM in my toolkit. You can easily test all your car issues regarding electrical wiring, spark plugs, batteries, audio system, and headlamps.
Which multimeter is best for car relay testing?
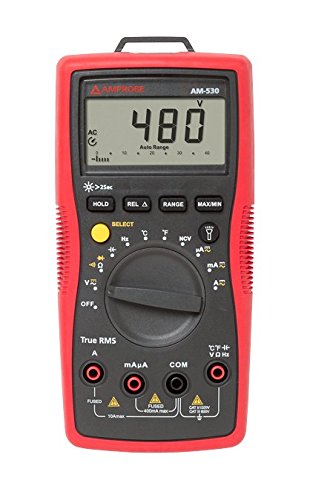
There is a wide range of multimeters available in the market. The best one is an auto-ranging digital multimeter. The selection of your multimeter depends upon your usage and ranges. If you’re a beginner, you can get a cheap one, but you need a True RMS multimeter for commercial use.
In addition to this, keeping in mind an automotive electrician’s usage, I have made a list of the best automotive multimeters.
You will definitely not use your multimeter only for relay testing. Instead, you will grab the one which can perform battery tests. But unfortunately, you can not perform an on-load battery test with it. So, for on-load testing, you need specially designed car battery testers.


