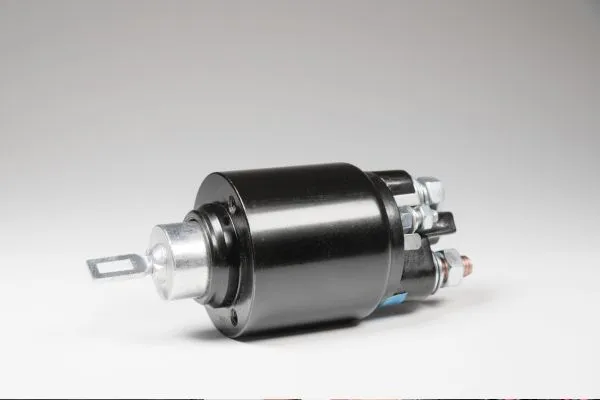
Variable Valve Timing (VVT) is a crucial component in modern engines, optimizing performance and fuel efficiency. At the heart of the VVT system lies the VVT solenoid, responsible for controlling valve timing. But how to test VVT solenoid with a multimeter?
Begin by locating the VVT solenoid, typically found on or near the engine block. Disconnect the solenoid’s electrical connector and set your multimeter to measure resistance. With the multimeter leads connected to the solenoid’s terminals, check for a resistance reading within the specified range provided by the manufacturer. A reading outside the range could indicate a faulty or malfunctioning VVT solenoid that may require replacement.
In this article, I will provide a step-by-step guide on testing the VVT solenoid with a multimeter, empowering you to ensure the optimal performance of your engine. Before knowing how to test VVT solenoid with a multimeter, you must understand what VVT or VVT solenoid is and its importance.
What is a VVT Solenoid?
The VVT solenoid is an electromechanical device that regulates oil flow to the VVT system. It operates based on electrical signals from the engine control unit (ECU). By adjusting the oil flow, the VVT solenoid controls the position of the camshaft, enabling precise valve timing according to the engine’s demands.

Importance of the VVT Solenoid
The VVT solenoid’s primary objective is to optimize engine performance and fuel efficiency across various operating conditions. It achieves this by adjusting the valve timing to match the engine’s speed, load, and other factors. This dynamic control allows for improved power delivery, reduced emissions, and enhanced engine efficiency.
Gather the Required Tools
To conduct the VVT solenoid test, you will need the following tools to test a VVT with a multimeter. tools are given below:
Multimeter
Ensure you have a reliable digital multimeter capable of measuring resistance.
Safety gloves and goggles: Protect yourself by wearing gloves and goggles throughout the testing process.
Service manual or online resources
Consult your vehicle’s service manual or reputable online sources for instructions and guidelines tailored to your particular make and model.
Safety Precautions
Safety should be your top priority before learning how to test VVT solenoid with a multimeter. So, Follow the safety precautions:
Disconnect the battery
Disconnect the vehicle’s battery and remove the keys from the ignition to avoid electrical shock or accidental engine activation.
Allow the engine to cool down.
Working with a hot engine can be hazardous. Give the engine sufficient time to cool down before proceeding with the test.
Follow proper safety guidelines.
Be cautious of moving parts and ensure the vehicle is secure and stable during testing. safety is an essential part of everything.
Inspect the VVT Solenoid
Before testing, visually inspect the VVT solenoid for any visible damage or debris accumulation. Look out for signs of oil leaks, loose connections, or corrosion. Cleaning the solenoid, if necessary, can help ensure accurate test results.
Read more about how to test a temperature sensor with multimeter
How to test VVT solenoid with a multimeter? Learn quickly just in 6 steps.

Now that you have prepared and gathered the necessary tools, it’s time to test the VVT solenoid using a multimeter. By following these step-by-step instructions, you can effectively assess the functionality of the VVT solenoid.
Step #1 Locating the VVT Solenoid
First, locate the VVT solenoid in your engine compartment. Refer to your vehicle’s service manual or online resources for specific guidance based on your make and model. Generally, you can find the VVT solenoid near the camshaft or the cylinder head.
Step #2 Removing the VVT Solenoid
To gain access to the VVT solenoid for testing, carefully disconnect the attached electrical connector. Depending on your vehicle, you may need to remove specific components or connectors before reaching the solenoid. Take note of their positions for reinstallation later. Once the solenoid is accessible, remove it from its mounting location.
Step #3 Multimeter Setup
Prepare your multimeter for resistance measurement. Set the multimeter to the appropriate resistance or ohms (Ω) range. Refer to the multimeter’s user manual for specific instructions on selecting the correct settings.
Step #4 Resistance Measurement
Now, it’s time to measure the resistance of the VVT solenoid. Connect the multimeter’s probes to the terminals of the solenoid. The terminals are typically labeled “A” and “B” or “1” and “2”. Ensure the probes make good contact with the terminals.
Observe the resistance reading on the multimeter’s display. A healthy VVT solenoid usually exhibits resistance within a specified range mentioned in the service manual. If the resistance reading is significantly higher or lower than the specified range, it may indicate a faulty solenoid.
Step #5 Testing Solenoid Response
Next, you will test the solenoid’s response to voltage. Set your multimeter to measure voltage (V) and choose a low voltage range, typically DC volts. Connect the multimeter’s positive probe to one solenoid terminal and the negative probe to another.
Apply voltage to the solenoid by turning the ignition key to the “ON” position without starting the engine. Observe the multimeter’s display for any voltage reading. A functioning VVT solenoid should show a voltage response on the multimeter, indicating that it is receiving and reacting to electrical signals.
Step #6 Reinstallation and Retesting
After completing the resistance and response tests, carefully reinstall the VVT solenoid into its original position. Reconnect the electrical connector and any components or connectors that were removed. Once everything is securely in place, repeat the resistance and response tests to ensure consistent and accurate results.
Read more about how to test VFD with multimeter?
Interpreting Test Results
Interpreting the results accurately after conducting the VVT solenoid test using a multimeter is essential. The test outcomes can provide valuable insights into the condition of the VVT solenoid and its impact on your engine’s performance.
Normal Resistance Readings

If the resistance reading falls within the specified range in your vehicle’s service manual, it indicates that the VVT solenoid is functioning correctly. This positive result suggests that the solenoid’s internal components are intact and provide the expected resistance.
Read more about 5 best multimeter for millivolts
Abnormal Resistance Readings
Abnormally high or low resistance readings may indicate a faulty VVT solenoid. Increased resistance can result from internal wire damage or open circuits, while low resistance can stem from short courses within the solenoid. In either case, a deviation from the specified resistance range suggests that the solenoid requires further inspection or replacement.
Lack of Solenoid Response
If the VVT solenoid does not respond when voltage is applied during the testing process, it indicates a potential issue. A lack of response can stem from a failed solenoid coil or problems with the solenoid’s internal mechanism. In such cases, the VVT solenoid may need to be replaced to restore proper functioning.
Engine Performance Considerations
Understanding the test results is crucial in assessing the overall impact on your engine’s performance. A properly functioning VVT solenoid contributes to optimized valve timing, improving power delivery, fuel efficiency, and reduced emissions.
On the other hand, a faulty solenoid can result in decreased engine performance, rough idling, diminished power, and compromised fuel economy.
FAQs (frequently asked questions)
How do I know if my VVT solenoid is bad?
Firstly, pay attention to irregular engine behavior, such as rough idling or stalling. Additionally, you might experience a decrease in fuel efficiency or a noticeable loss of power while driving. Another clue could be unusual noises from the engine, such as ticking or knocking.
Read more about symptoms of bad VVT solenoid
If you observe any of these symptoms, having your vehicle inspected by a qualified mechanic who can diagnose the issue and determine if the VVT solenoid is the culprit is recommended. Addressing any potential problems promptly will help ensure your engine’s optimal performance and longevity.
Will thicker oil affect VVT?
The viscosity or thickness of the oil used in your engine can impact the Variable Valve Timing (VVT) system. Choosing the oil viscosity the vehicle manufacturer recommends is essential, as the owner’s manual specifies. Thicker oil can potentially hinder the VVT system’s ability to function optimally, as it may struggle to flow quickly enough through its passages and solenoids.
On the other hand, using too thin oil may not provide adequate lubrication and protection for the engine components. Thus, it’s crucial to use the right oil viscosity to maintain proper operation of the VVT system and promote overall engine health.
Does VVT increase power?
Yes, Variable Valve Timing (VVT) can increase engine power. By adjusting the timing of the intake and exhaust valves, VVT optimizes the engine’s efficiency and performance across different operating conditions. The system enables the valves to be open and close at the most appropriate times, allowing for better air/fuel mixture control and improved combustion.
This results in enhanced power output, especially at higher engine speeds, and can also contribute to increased torque and fuel efficiency. VVT technology has become widely adopted by manufacturers due to its ability to enhance engine performance while balancing power, fuel economy, and emissions.
What voltage is a variable valve timing solenoid?
When testing a VVT solenoid with a multimeter, consider its voltages. The voltage required for a variable valve timing (VVT) solenoid can vary depending on the vehicle’s electrical system. Generally, VVT solenoids operate on various voltages commonly found in automotive systems, typically between 12 volts (V) and 14 volts (V). This voltage is supplied by the vehicle’s electrical system, which includes the battery and alternator. The VVT solenoid acts as an electromagnetic valve, utilizing this voltage to control the flow of oil to adjust the timing of the engine’s valves.
It’s important to note that precise voltage specifications may vary among different vehicle models and manufacturers. Suppose you suspect a problem with your VVT solenoid. In that case, it’s advisable to consult your vehicle’s documentation or seek professional assistance to ensure accurate voltage requirements and proper functioning of the VVT system.
Should I reconnect the electrical connector to the VVT solenoid after testing?
Absolutely! After testing a Variable Valve Timing (VVT) solenoid, it is crucial to reconnect the electrical connector. This step ensures the solenoid can resume regular operation and function effectively within the engine system.
The electrical connector establishes the connection between the VVT solenoid and the vehicle’s electrical system, allowing it to receive the necessary signals and voltage for proper functioning.
By reconnecting the electrical connector, you restore the vital electrical pathway required for the VVT solenoid to accurately adjust the engine’s valves’ timing.
Final thoughts
Learn how to test VVT solenoid with a multimeter is crucial for optimizing its performance. You can effectively diagnose potential issues by carefully following the steps, such as disconnecting the solenoid, setting the multimeter to the appropriate mode, and measuring resistance.
This process helps ensure peak engine performance and prevents costly repairs. Always prioritize safety precautions and consult the vehicle’s manual for accurate and reliable testing of the VVT solenoid with a multimeter.

