If you don’t know how to test a temperature sensor with a multimeter then usama is here to help you out. Temperature sensors are used in a variety of applications, including HVAC systems, automotive engines, and many other types of equipment.
It is important to test the accuracy of your temperature sensor to ensure that it is providing accurate readings. So here, I will tell you how to use a digital multimeter to test temperature sensors. But first let see what is a temperature sensor and how it works.
What is a temperature sensor and what does it do?
A temperature sensor is a device that measures the ambient temperature. It can be used to monitor the environment, or it can be used in conjunction with other devices to control a process.

For example, in an HVAC system, a temperature sensor can be used to detect when the room has reached the desired temperature and then signal the heating or cooling system to turn off. In industrial applications, the most commonly used temperature sensors are thermocouples, RTD and PT100.
If you haven’t select any clamp meter yet then you must visit my guide on best DC Clamp meter for solar work.
How does a temperature sensor work?
A temperature sensor typically consists of two parts: a sensing element and a signal conditioner. The sensing element is usually made of metal or semiconductor material, such as silicon. When the ambient temperature changes, the resistance of the sensing element also changes. This change in resistance is converted into a change in voltage or current by the signal conditioner, which is then outputted as an analog or digital signal. Also read how to test vdf.
3 Main Types of Temperature Sensors
There are three main types of temperature sensors: resistance temperature detectors (RTD), thermocouples, and silicon diodes.
1. Resistance Temperature Detectors (RTD):
RTDs are made of a metal wire or ribbon that has been wound into a coil. The resistance of the metal changes with temperature, so by measuring the voltage across the RTD, you can determine the ambient temperature. Moreover, the most common type of RTD is the platinum RTD, which has a resistance that changes linearly with temperature.

2. Thermocouples:
A thermocouple is made up of two dissimilar metals joined together at one end. When the junction of these two metals is heated, a voltage is generated. The magnitude of this voltage reading depends on the type of metals used and the temperature of the junction. Thermocouples are often used in high-temperature applications because they can withstand very high temperatures. There are different type of thermocouples, so I have made a separate guide about testing thermocouples.

3. Silicon Diodes:
A silicon diode is made up of a piece of silicon that has been doped with impurities to create a P-N junction. When the diode is exposed to heat, the resistance of the silicon changes. By measuring this change in resistance, you can determine the ambient temperature. Silicon diodes are often used in low-temperature applications because they are very sensitive to small changes in temperature.

The most common way to test a temperature sensor is by measuring the change in resistance as the ambient temperature changes. You can do this using a digital multimeter with an ohmmeter function. Set the
Now that we know what a temperature sensor is and how it works, let’s see how to test it with a multimeter.
How to Test a Temperature Sensor with a Multimeter- A detailed Guide
Temperature sensors play a crucial role in monitoring and regulating temperature levels in various systems. However, it’s important to ensure their accuracy and proper functioning.
In this guide, we will walk you through step-by-step instructions on how to test a temperature sensor using a multimeter, allowing you to identify and address any issues that may arise.
Recommended Klein mm720
 Fluke 115
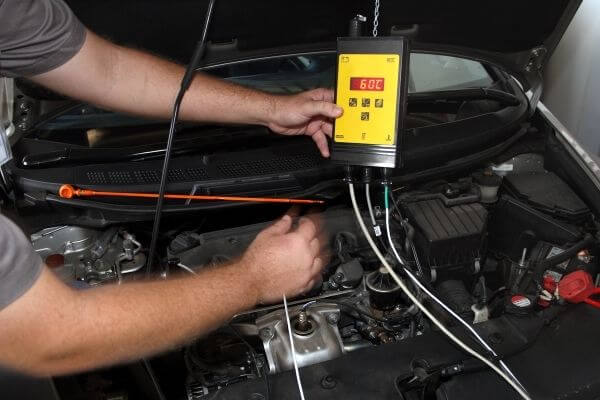
 Sensor Tester Monitor
Whether you suspect a bad temperature sensor affecting your vehicle’s temperature gauge or suspect inaccurate fuel injection due to a malfunctioning sensor, this guide will help you diagnose and troubleshoot the problem.
Step 1: Gather the necessary tools and materials
Before starting the testing process, make sure you have the following items handy: a multimeter, multimeter leads, a wire harness, hot water, cold water, and access to the engine block.
Step 2: Prepare the temperature sensor for testing
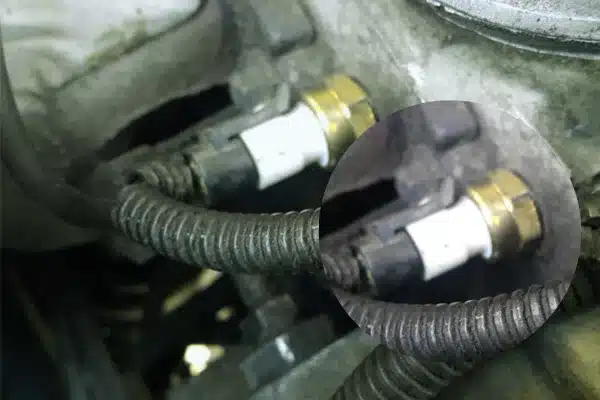
Locate the temperature sensor in your system, typically found near the engine block or connected to the cooling fan. Ensure the sensor is accessible and any wire harness connected to it is disconnected.

Step 3: Set up the multimeter
Turn on your multimeter and select the appropriate setting for resistance measurement (Ω). Connect the multimeter leads to the corresponding ports on the multimeter.
Step 4: Measure the resistance of the temperature sensor

Take one of the multimeter leads and touch it to the terminal or connector on the temperature sensor. Connect the other lead to the sensor’s ground or any metal surface nearby. Ensure a secure connection is established.
Step 5: Note the initial resistance reading
Observe the multimeter display and note down the initial resistance reading. A properly functioning temperature sensor typically exhibits resistance within a specific range, which can vary depending on the sensor’s specifications.
Step 6: Test the temperature sensor in hot water

Prepare a container with hot water, ensuring it is at a suitable temperature. Immerse the temperature sensor in the hot water, making sure it is completely submerged. Be cautious to avoid any contact with the multimeter or its leads.
Step 7: Measure the resistance in hot water
With the temperature sensor immersed in the hot water, repeat the measurement process by touching one multimeter lead to the sensor’s terminal or connector and the other lead to the sensor’s ground or nearby metal surface. Take note of the resistance reading displayed on the multimeter.
Step 8: Test the temperature sensor in cold water
Similarly, prepare a container with cold water. Immerse the temperature sensor in the cold water, ensuring complete submersion without any contact between the multimeter and the water.
Step 9: Measure the resistance in cold water
Once the temperature sensor is fully immersed in the cold water, repeat the resistance measurement process. Touch the multimeter leads to the appropriate terminals and record the resistance reading displayed on the multimeter.
Step 10: Compare resistance readings and interpret results
Compare the resistance readings obtained in steps 5, 7, and 9 with the temperature sensor’s specifications. If the readings fall within the expected range, it indicates that the sensor is functioning properly. However, if the resistance values are significantly different or out of range, it suggests a faulty or bad temperature sensor.By following these step-by-step instructions, you can effectively test most temperature sensors using a multimeter. Regularly testing and ensuring the accuracy of temperature sensors is essential. It helps prevent issues such as inaccurate fuel injection or a malfunctioning vehicle’s temperature gauge.
Additionally, identifying and replacing a bad temperature sensor can greatly improve the performance and efficiency of your system. This ensures reliable temperature readings and optimal functionality.
How to test a temperature sensor with a multimeter- Common Guide

- First of all you need a multimeter. It can be analog or digital, but i prefer digital multimeters. Now, Turn it on and set the dial to resistance. Moreover, make sure that the test leads are inserted in the slots properly. Red Test lead in (V) and black test lead in the (Com).
- Now, take the temperature sensor and connect it in between the red test lead and black test lead.
- Now, slowly increase the temperature of the sensor by heating it with a lighter or using a heat gun. You will see the resistance on the multimeter changing as you increase the temperature.
- You can also use a silicon diode to test the temperature sensor. Just connect it in between the red and black test leads. The resistance of the silicon diode will change as the temperature changes.
By using a multimeter, you can easily test a temperature sensor and see if it is working properly.
How to test temperature sensor of your car or truck?
There are a few ways to test vehicle’s temperature sensor with multimeter. The most common way is to locate the sensor and measure the resistance between it and ground. Another way is to measure the voltage at the sensor. There might be heavy chances that your car control unit is faulty. Do check them also.
Wire Tracing

The easiest way to find the temperature sensor is to look for a two-wire connector with a yellow or orange wire. The connector usually has a label that says “temperature.” The sensor is located on the intake manifold, near the firewall.
Standard measurement range
If you can’t find the electrical connector or if the sensor is buried deep inside the engine temperature box. A temperature sensor is also in the intake plenum of engine. You’ll have to measure the resistance between the two wires coming from engine. Therefore, measurement should be taken at room temperature (about 20 degrees C). The resistance should be about 1000 ohms.
Multimeter connections
If you’re measuring the voltage, connect the positive lead of the multimeter to the wire that goes to the engine computer (usually a white wire with a black stripe). Connect the negative lead of the multimeter to ground. The voltage should be about 0.45 volts at room temperature. So, if the voltage is outside of this range, the sensor may be bad.
If you’re not sure which wire is the positive and negative lead, try measuring the resistance between each wire and ground. The reading should be about the same for both wires. If it’s not, one of the wires is probably reversed.
Use of scan tool
You can also use a scan tool to test the sensor. The scan tool will show you the voltage or resistance of the sensor. It will also show you the temperature that the sensor is reading.

Testing automotive temperature sensor can be done with multimeter easily and it is a helpful way to locate problems in your car or truck. With this guide, testing temperature sensor should be a breeze.
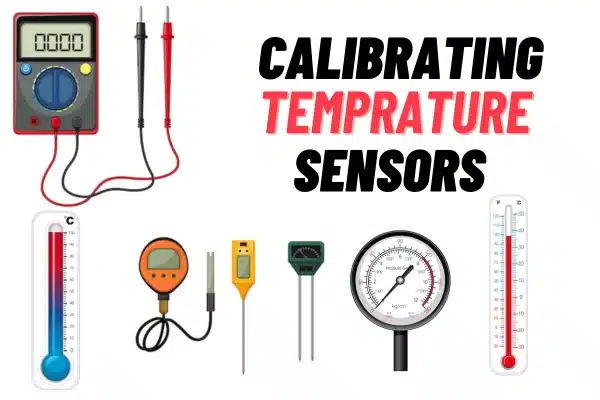
Now that we know how to test a temperature sensor with a multimeter, let’s see how to calibrate it. In addition to this, if you don’t have a multimeter yet then you can check my life of best multimeter for electronics technicians.
7 Common problems with temperature sensors and how to fix the
1-Sensor is dirty or contaminated:
If the sensor is dirty or contaminated, it will not give accurate results. Clean the sensor with a clean cloth and try testing it again.
2-Sensor is broken:

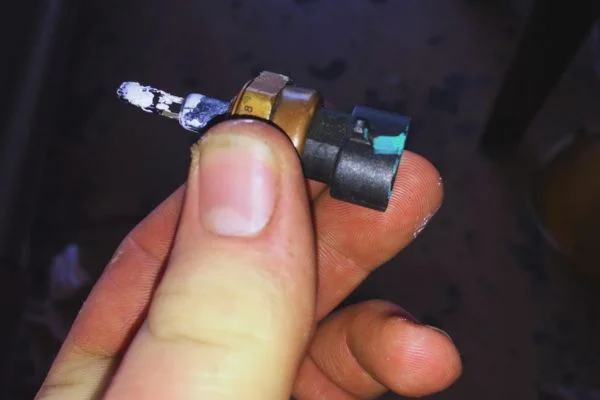
If the sensor is broken, you will see a constant reading on the multimeter, even when the temperature changes. You can easily assess its condition by sensor’s body. If there is any break just replace the sensor with a new one. If there is any temperature always make sure that it is in good condition.
3-Coolant temperature sensor is defective:
If the sensor is defective, you will see erratic readings on the multimeter, even when the temperature doesn’t change. Replace the sensor with a new one.
4-Leads are not connected properly:
If the leads are not connected properly, you will get inaccurate readings on the multimeter. Furthermore, make sure that the test leads are inserted in the slots properly.
5-Meter is not set to resistance:

If the meter is not set to resistance, you will get inaccurate readings on the multimeter. Make sure that the dial is set to resistance and try testing it again.
6-Ambient temperature is too high or too low:
If the ambient temperature is too high or too low, you will get inaccurate readings on the multimeter. Try testing the sensor in a different environment or check the wires, there must be a leakage.
7-Calibration is not correct:
If the calibration is not correct, you will get inaccurate readings on the multimeter. calibrate the meter according to the instructions in the manual and try testing it again. You can do this negative temperature coefficient measurement.
These are the most common problems that you will face while testing a temperature sensor with a multimeter. By following the instructions given above, you can easily test and calibrate a temperature sensor.
How to calibrate a temperature sensor with a multimeter?

A faulty temperature sensor not only damage the equipment or your car but can also put your life into danger. Mostly cars upper radiator hose or coolant sensor malfunctioned, which can cause complete engine failure.
- The first step is to find the resistance of the sensor at a known temperature. This can be done by using a table of values or by measuring the resistance with a multimeter.
- Next, you need to determine the actual temperature of the sensor. This can be done by using a thermometer or by measuring the voltage across the sensor.
- Finally, you need to compare the resistance of the sensor at the known temperature with the actual temperature of the sensor. If they are not equal, then you need to adjust the calibration constant until they are equal.
By following these steps, you can easily calibrate a temperature sensor with a multimeter.
Tips for keeping your temperature sensor working properly
Clean the sensor regularly:
If the sensor is dirty or contaminated, it will not give you actual temperature. Clean the sensor with a clean cloth and try testing it again.
Keep the wires away from heat:
If the wires are exposed to heat, they will get hot and distort the readings on the multimeter. Keep them away from heat sources.
Check the calibration regularly:
If the calibration is not correct, you will get inaccurate readings on the multimeter. Check the calibration regularly and adjust it if necessary.
Replace the batteries regularly:
If the batteries are weak, they will not be able to power the sensor properly and you will get inaccurate readings. Replace the batteries regularly.
Keep the sensor away from strong magnetic fields:
If the sensor is exposed to a strong magnetic field, it will not work properly. Keep it away from magnets and other sources of electromagnetic radiation.
Handle the sensor carefully:
If the sensor is dropped or mishandled, it will break and you will have to replace it. Handle the sensor carefully. If there is a thermostat then check thermostat housing first.
Store the sensor in a safe place for accurate temperature reading:
If you are not using the sensor, store it in a safe place where it will not get damaged. Store it in a cool, dry place.
These are some tips that will help you keep your temperature sensor working properly. By following these tips, you can ensure accurate readings from your sensor.
5 Multimeters Recommended for testing temperature
1. Fluke 116 HVAC Multimeter
Fluke 116 is a choice of professional HVAC technicians. It has a LED display backlight which makes it easy to read in low light conditions. This meter has a built in thermometer so you can take temperature readings without having to carry an extra instrument. The microamps mode allows you to test flame sensors, and the LoZ mode prevents false readings. You can also check Resistance, continuity, frequency and capacitance with this multimeter easily.
4.8/5 stars with 367 Reviews
2. Klein Tools ET600 Multimeter
This Klein Tools multimeter is perfect for electricians, contractors, and home DIYers. With a resistance up to 4000M ohms, it can measure up to 1000V AC/DC, resistance, and continuity. The True Root Mean Square (TRMS) technology ensures increased accuracy, while the bar graph and Auto-power off features make it easy to use. The low battery indicator lets you know when it’s time to replace the battery, and the fuse is easily replaceable. you can also check your car solenoid with it. For a guide you can check my solenoid testing blog.
4.7/5 stars with 553 Reviews
3. Amprobe AM-570 Industrial Digital Multimeter
This is a hand-held digital multimeter with a flashlight. It can be used to measure voltage, current, resistance, frequency and capacitance. The meter has true RMS detection for accurate measurements of non-sinusoidal waveforms such as those produced by motors and generators. The low Z measurement capability makes it possible to detect stray voltages in electrical systems. A duty cycle measurement function allows the user to determine the percentage of time that an output is active during each cycle of a repetitive waveform.
The AM-570 also features temperature measurement (-22°F to +572°F), capacitance measurement (0.001 to 100000μF), and an auto power off function.
4.6/5 stars with 349 Reviews
4. Klein Tools MM700 Multimeter
This is a hand-held digital multimeter with a large, easy-to-read LCD display. It can be used to measure voltage, current, resistance, frequency and capacitance. The meter has true RMS detection for accurate measurements of non-sinusoidal waveforms such as those produced by motors and generators. You can measure up to 1000V AC/DC voltage, 10A AC/DC current and 40MOhms resistance. Plus, it has a CAT IV 600V Safety Rating and is built to withstand a 6.6-foot (2m) drop. The Klein Tools MM700 is also durable enough to withstand daily wear and tear on the job site. Klein also offers a budget friendly range of multimeter Klein mm600. You can check my blog about Klein mm700 vs mm600 to make your final decision.
4.7/5 stars with 490 Reviews
5. AstroAI Digital Multimeter 10000 Counts
AstroAI smart multimeter is a multifunctional and intelligent digital multimeter with 10000 counts display. It has a high-resolution color screen, and can automatically identify voltage, resistance, continuity and diode test. The smart mode of the meter can accurately measure voltage (V), current (I), resistance (Ω), frequency (Hz), duty cycle (%), and capacitance. With its high accuracy, it is suitable for electronic circuit. The operating temperature range of this sturdy electrical teste is up to 50℃. With it high temperature gauge you can measure hot and cold readings from -40℃ to 300℃.
4.6/5 stars with 289 Reviews
Conclusion
All in all, properly calibrating and maintaining your temperature sensors is key to keeping your equipment or car running smoothly. By following the steps I outlined above, you can test and calibrate any temperature sensor in no time. Have any questions or comments? Let us know in the comments below! If you looking for best automotive multimeters then you can visit my blog.
FAQs- Frequently Asked Questions
What is the estimated cost of replacing your car temperature sensor in USA?
If you don’t know how to test a temperature sensor with a multimeter then its a costly process. Temperature sensors are usually priced between $50 and $200 for replacement. A labor charge of $50 to $100 or more may be charged for installation, which depends on the location and the mechanic or dealership. Based on factors like the vehicle model and make, the replacement part type, and whether the part is OEM (original equipment manufacturer) or aftermarket, the figure should be used as a guide. It’s advisable to contact local mechanics, auto repair shops, or dealerships for a more accurate cost estimate.
What is the difference between a thermocouple, RTD, thermistor, and semiconductor sensor?
- A thermocouple generates a voltage when exposed to a temperature difference and consists of two different metal wires joined at the ends.
- An RTD measures changes in electrical resistance due to changes in temperature and typically consists of a metal wire wound around a ceramic or glass core.
- A thermistor is a type of resistor whose resistance changes with temperature and is typically made of ceramic or polymer material.
- A semiconductor sensor uses a silicon-based semiconductor material to measure changes in resistance due to changes in temperature.
How do I determine which type of temperature sensor I have and how to test it with a multimeter?
- You can determine the type of temperature sensor you have by consulting its datasheet or by visually inspecting it for any identifying marks or labels.
- To test a temperature sensor with a multimeter, you will need to select the appropriate multimeter setting based on the type of sensor you have and then measure its resistance or voltage as per the specifications provided in the datasheet.
What should I do if I encounter incorrect readings when testing a temperature sensor with a multimeter?
- Incorrect readings can occur due to a variety of reasons, such as improper sensor placement, damaged sensor, or incorrect multimeter setting.
- If you encounter incorrect readings, you should first double-check the multimeter setting and sensor placement to ensure they are correct.
- You should also inspect the sensor and multimeter for any damage that may be affecting the readings.
- If the issue persists, consult the datasheet or contact the sensor manufacturer for further troubleshooting steps.
What safety precautions should I take when testing a temperature sensor with a multimeter?
- Always wear appropriate personal protective equipment (PPE) such as gloves and safety glasses when handling temperature sensors and multimeters.
- Ensure that the equipment is properly grounded and insulated to prevent electric shock.
- Keep the sensor and multimeter away from any flammable or explosive materials.
- Turn off the power supply to the sensor before connecting the multimeter probes to it.
How often should I test my temperature sensor with a multimeter, and what are the consequences of not testing it regularly?
- The frequency of testing will depend on the application and the criticality of the temperature measurement.
- As a general rule, temperature sensors should be tested periodically or whenever there is a significant change in the measured temperature.
- Failure to test temperature sensors regularly can result in inaccurate temperature measurements, which can cause process inefficiencies, product defects, or even safety hazards.


