

An electronic choke is an important part of a vehicle’s electrical system. It helps to regulate the amount of air and fuel mixture to control the engine’s performance. When the choke is not functioning properly, it can lead to several problems including poor performance, difficulty starting, and higher fuel consumption. How to repair an electronic choke comes to mind. Fortunately, it is possible to repair an electronic choke relatively easily. Although to repair the electronic choke, you will need a few basic tools and some replacement parts. Once the repair is complete, you should have a functioning electronic choke and improved engine performance.


Step-by-Step Procedure- How To Repair An Electronic Choke
- 1. Disconnect the negative battery cable from the car’s battery and ensure that all the electrical components in your engine bay are turned off.
- 2. Also, remove any air intake components that may be blocking access to the choke, if necessary.
- 3. Locate the choke on the engine and carefully remove it, taking care to not damage any surrounding components.
- 4. Inspect the choke and its housing for signs of damage. If any of the components are damaged, then they will need to be replaced with new ones.
- 5. Clean the choke housing and remove any debris or residue that has accumulated around the component.
- 6. Install the replacement choke (if necessary) and reassemble the engine bay.
- 7. Reconnect the negative battery cable and start up the engine to test the choke’s performance.
- 8. If the choke is still not working properly, you may need to replace some of the other components in the ignition system.

With a few simple tools and some basic knowledge of car mechanics, you can quickly and easily repair an electronic choke. With a properly functioning choke, your engine will be able to run at peak performance, while improving fuel efficiency and reducing emissions.
A Quick Look
Tools you should have before starting a procedure:
- Socket wrench set
- Multi-meter
- Screwdriver set
- Replacement parts (if necessary)
- Electrical connectors
- Electrical tape
- Wire cutters/strippers.
- Wire crimpers.
- Vacuum hose clamps and pliers.
- Automotive hand cleaner.
- A can of electrical contact cleaner.
- Safety glasses.
- Gloves.
- A clean towel or shop rag.

Tips to repair electronic choke:
- Carefully inspect the choke for signs of damage and wear before attempting to repair it.
- Make sure all electrical components are disconnected before attempting to remove the choke from the engine.
- Be sure to install any new components securely and make all electrical connections with care, as loose connections can be dangerous.
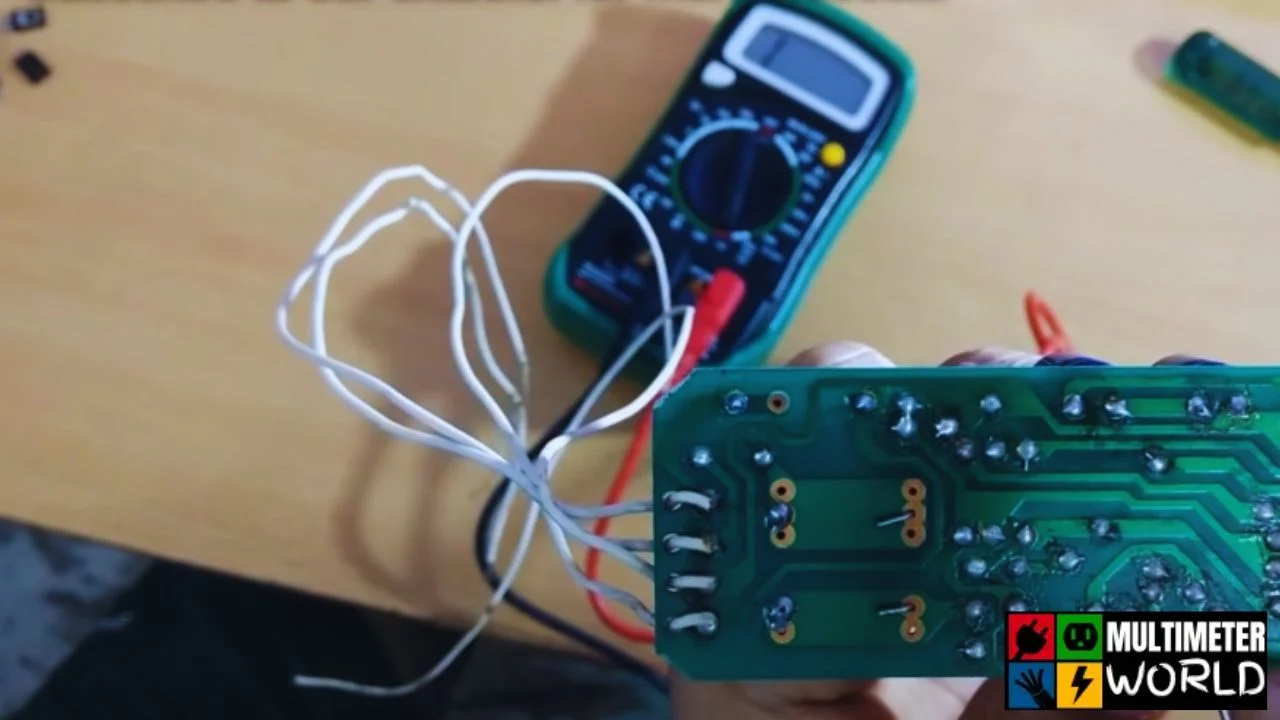
- Use a multimeter to test the choke’s performance before reinstalling it into the engine.
- If you are unsure of how to repair an electronic choke, consult a professional for assistance.
- Make sure to wear safety glasses, gloves, and other appropriate safety gear when working with electrical components.
- Clean up any spilled oil or fuel before starting the repair process.
- Don’t forget to reconnect the negative battery cable before starting up the engine.

Philips electronic choke repair guide:
- First, locate the choke on your engine and disconnect the negative battery cable.
- Remove any air intake components that may be blocking access to the choke.
- Carefully remove the choke from the engine, taking care not to damage any other components in the process.
- Inspect the choke and its housing for signs of damage or wear.
- If any components are damaged, replace them with new ones.
- Clean the choke housing and remove any debris or residue that has accumulated around it.
- Reassemble the engine bay and reconnect the negative battery cable.
- Start up the engine to test the choke’s performance.

How to fix an electronic choke in the tube light?
- Turn off the power and remove the tube light from its fitting.
- Locate the choke on the tube light and carefully remove it.
- Inspect the choke and its housing for signs of damage or wear.
- If any components are damaged, replace them with new ones.
- Clean the choke housing and remove any debris or residue that has accumulated around it.
- Reassemble the tube light and reconnect the power.
- Start up the tube light to test the choke’s performance.
8. If the choke is still not working properly, you may need to replace some of the other components in the tube light system.If you wanted to learn about the difference between Fluke and Klein multimeters, you can click here.

NOCO Boost Plus GB40
⭐ 4.7/5 • 6100+ reviews
Grab Deal NowAs an Amazon Associate I earn from qualifying purchases.
Wrapping Up:
We had discussed how to repair electronic choke and fix electronic choke in tube lights, which requires basic knowledge of car mechanics and a few simple tools. With a properly functioning choke, your engine will be able to run at peak performance, while improving fuel efficiency and reducing emissions.
Make sure to wear safety glasses, gloves, and other appropriate safety gear when working with electrical components. So, if you are unsure of how to repair an electronic choke, consult a professional for assistance.
FAQs:
What tools do I need to repair an electronic choke?
You will need a socket wrench set, multi-meter, screwdriver set, replacement parts (if necessary), electrical connectors, electrical tape, wire cutters/strippers, and many more.
What are the steps to repair an electronic choke?
The steps include: inspecting the choke, removing it from the engine, replacing any damaged components, cleaning the choke housing, reassembling the engine bay, reconnecting the negative battery cable, start up the engine to test performance.
How can I test the choke’s performance?
You can use a multimeter to test the choke’s resistance and current draw. It is important to test the performance of the choke before installing it back into the engine.
What safety precautions should I take when repairing an electronic choke?
You should always wear safety glasses, gloves, and other appropriate safety gear when working with electrical components. Make sure to clean up any spilled oil or fuel before starting the repair process, and never forget to reconnect the negative battery cable before starting up the engine.
What are some common signs of a failing choke?
Some common signs of a failing choke are difficulty starting the engine, stalling, and decreased fuel efficiency. However, if the choke fails, it can cause the engine to not have the appropriate amount of fuel to run efficiently.